Category: DIY Fire Pit

  • What Are the Pros And Cons of Fire Pit Cooking?

    What Are the Pros And Cons of Fire Pit Cooking?

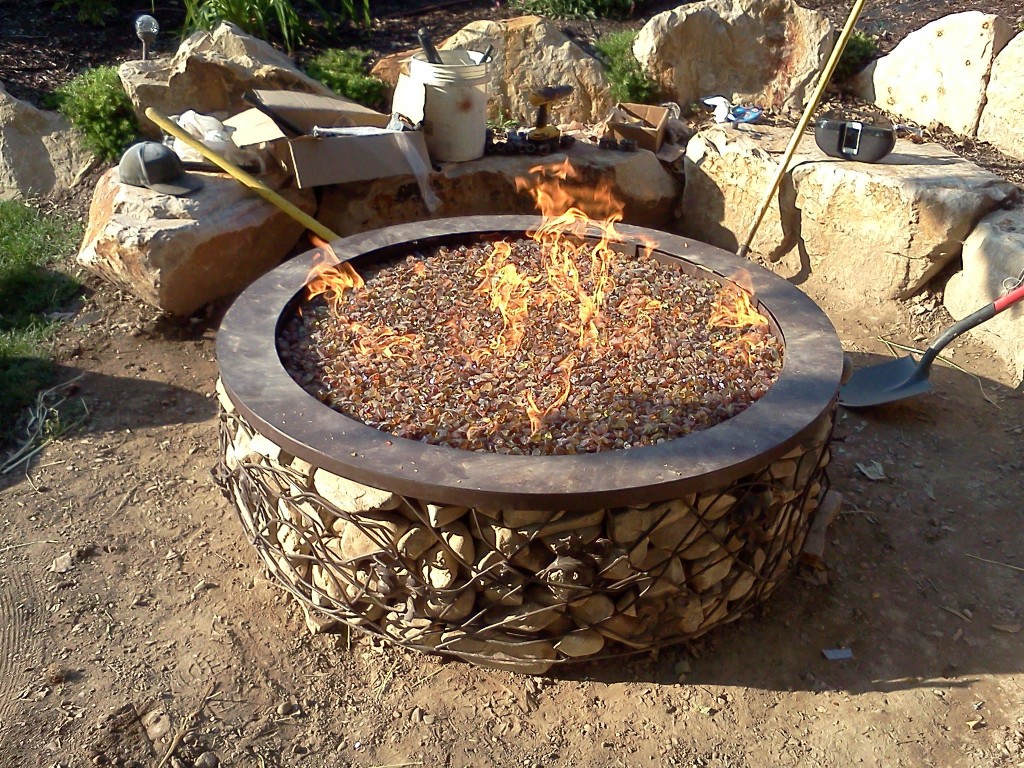
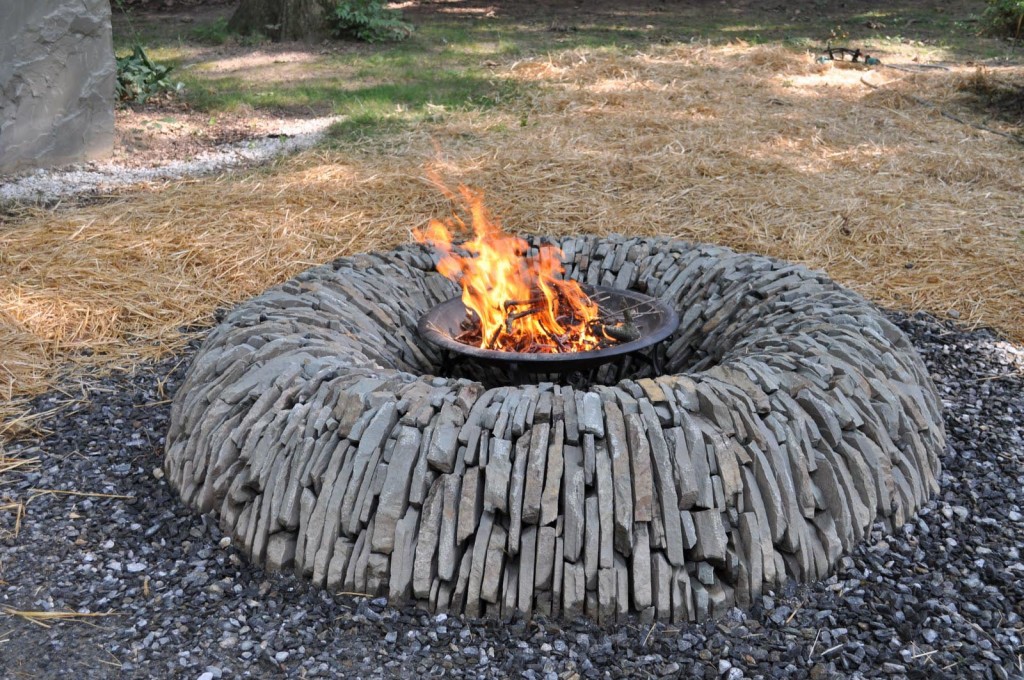
    Fire pit cooking is a fantastic way to combine the joy of a gathering around a warm fire with the pleasure of preparing and enjoying food outdoors. Whether you’re making a casual meal for friends or preparing a feast for the whole family, a fire pit can serve as the perfect cooking station for a variety of dishes. Here’s how to make the most of your fire pit cooking experience, along with essential safety tips to ensure everything goes smoothly.

    Key Fire Pit Cooking Tips

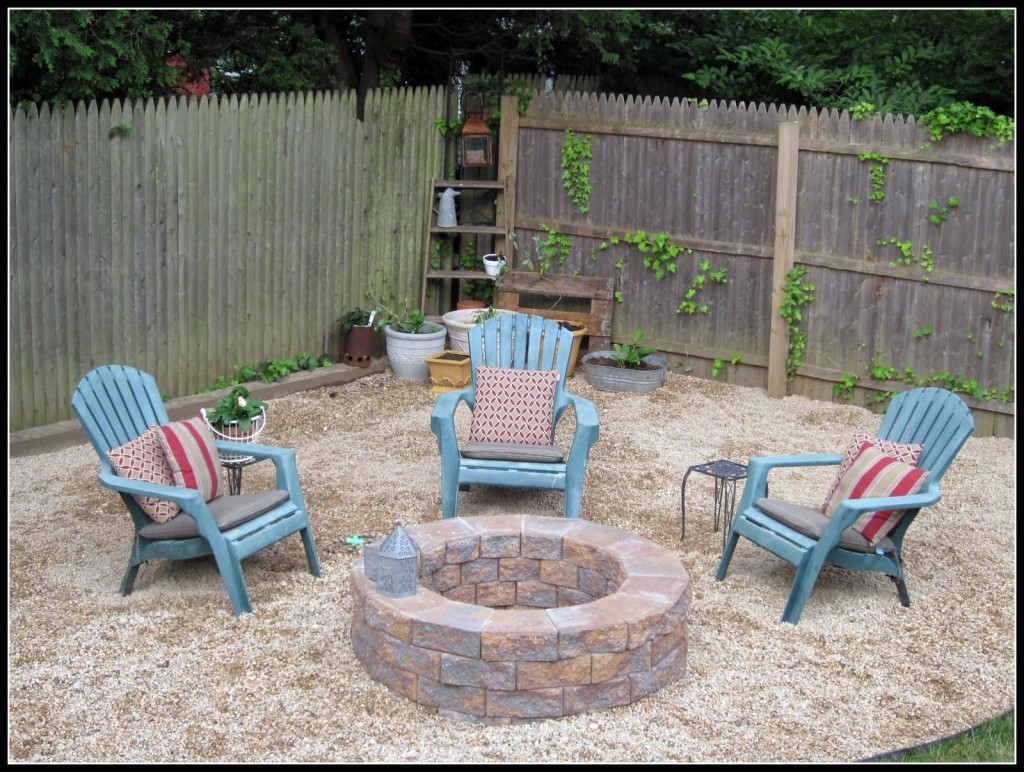
    1. Safety First: Fire Pit Placement

    When setting up your fire pit, safety should always come first, especially when it involves cooking. To prevent any accidents:

    • Positioning: Ensure the fire pit is placed at least 10 to 15 feet away from any flammable objects, such as houses, furniture, and tree branches. This prevents the risk of fire spreading and keeps everything safe during cooking.
    • Wind Awareness: Avoid placing your fire pit in areas where the wind might cause sparks to fly, especially if you’re cooking with oils or meats that could ignite easily.
    • Clear Area: Keep the surrounding area free of flammable materials, such as dry grass, leaves, or cloth furniture, that could catch fire while you’re cooking.

    2. Types of Fire Pit Cooking

    There are several ways to cook using a fire pit, and it depends on your preferences, the food you want to prepare, and your setup.

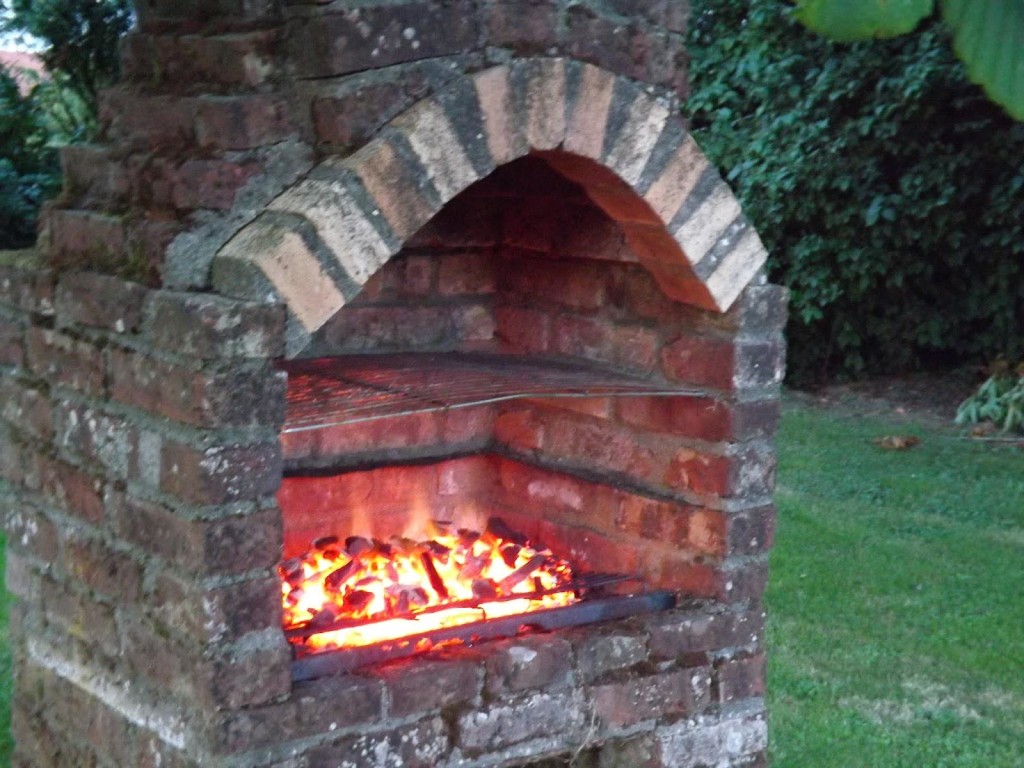
    A. Grilling Over Open Flames
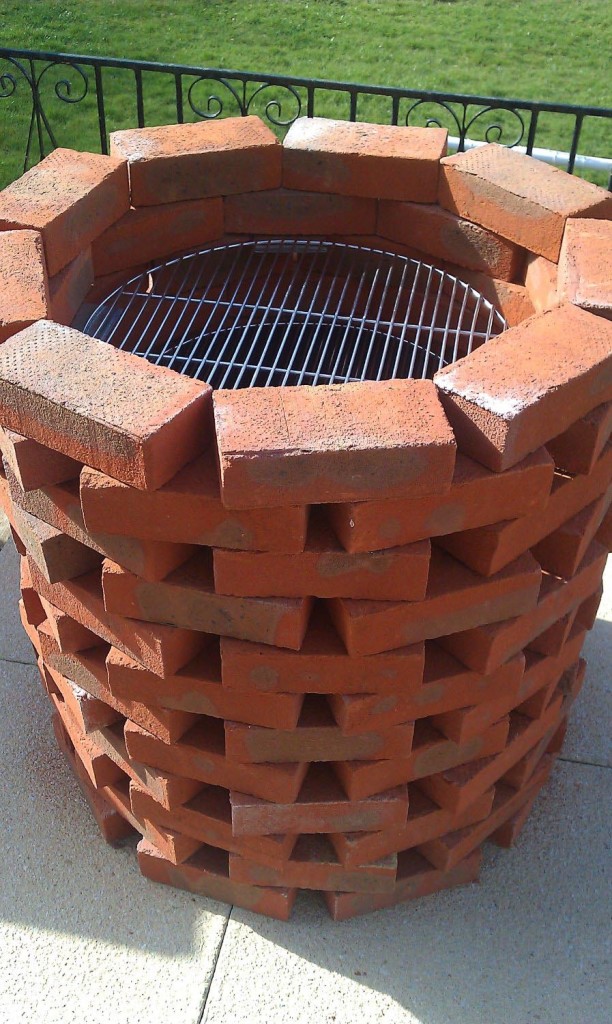
    • Fire Pit Grates: One of the most popular fire pit cooking accessories is the grill grate, which sits above the fire to cook food like steaks, burgers, or vegetables. Grilling over an open flame gives food a delicious smoky flavor and is a perfect method for quick meals.
    • Adjustable Height Grates: Some fire pits come with adjustable grates, allowing you to control the cooking height and temperature. This can be particularly useful for slower cooking and avoiding overcooking or burning your food.
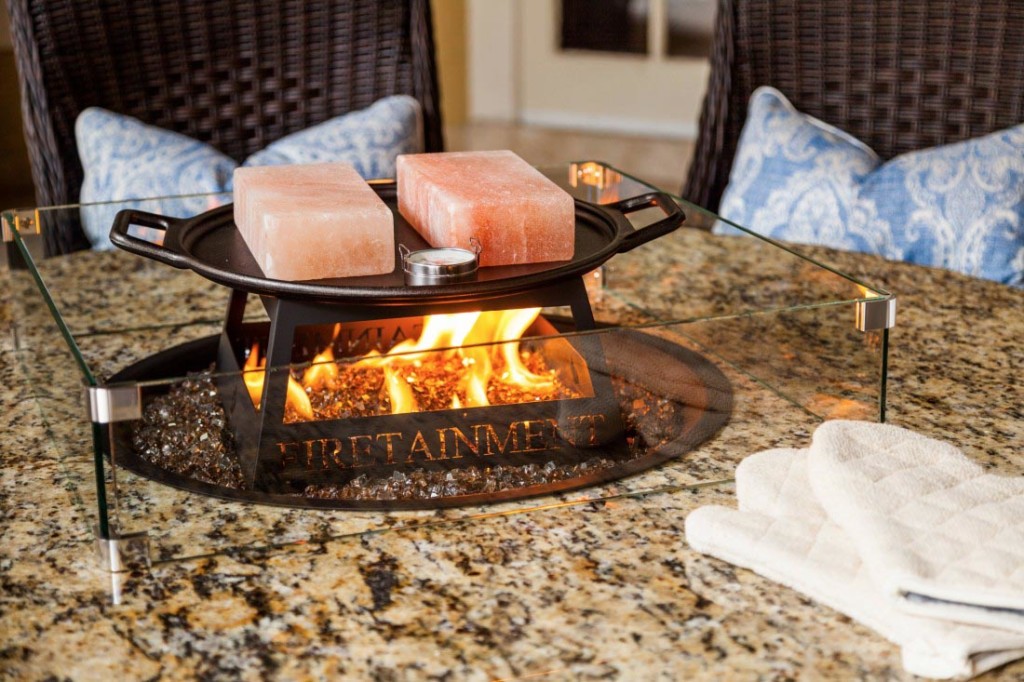
    B. Cooking with Cast Iron
    • Cast Iron Skillet: Another method is using a cast iron skillet or Dutch oven over the fire. These sturdy cooking tools can be used for making stews, soups, or even baking bread. Just make sure to have a stable surface or a sturdy cooking platform.
    • Campfire Pots: You can hang a pot over the fire, perfect for cooking stews, soups, or pasta. A tripod stand or hook system can be used to suspend the pot over the fire, giving you more control over the heat.
    C. Roasting on Skewers or Spits
    • Skewers: For a fun, hands-on cooking experience, you can roast marshmallows, sausages, or vegetables on skewers directly over the fire. This method allows for interactive cooking where everyone can take turns roasting their favorite foods.
    • Rotisserie Spit: For larger cuts of meat, a rotisserie spit over the fire pit can provide slow, even cooking. This is perfect for larger gatherings where you want to cook a whole chicken or roast meat.
    D. Pizza Cooking in Fire Pit
    • Pizza Stone: Fire pits can be used for cooking pizzas with the help of a pizza stone. You can set the stone on a metal grate and place your pizza on it. The stone will help distribute heat evenly, giving you a crispy crust and perfectly cooked toppings.

    3. Managing the Cooking Process

    When cooking on a fire pit, managing the heat is key to avoid burning food or overcooking. Here’s how:

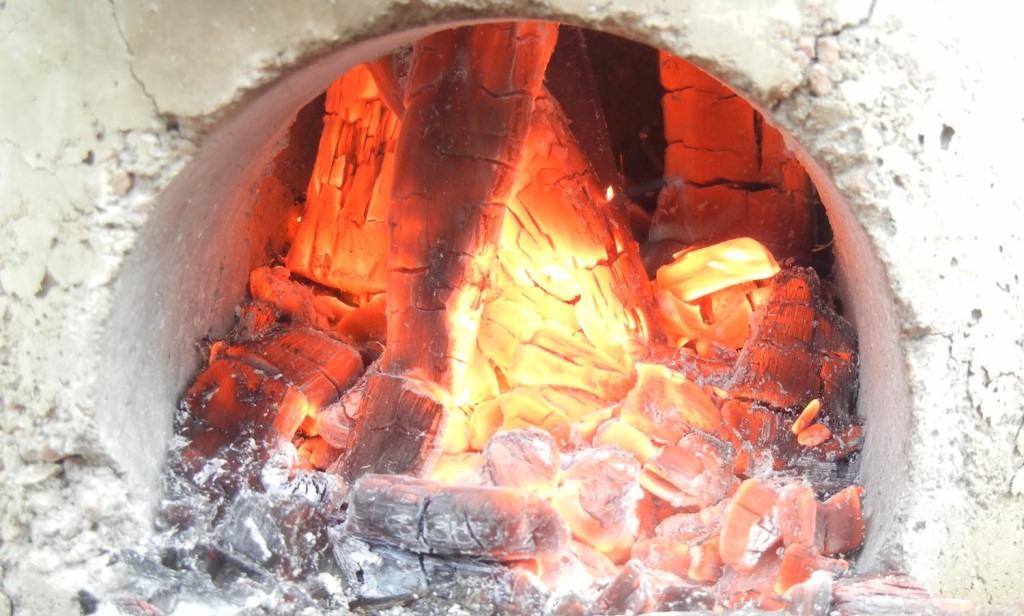
    • Charcoal or Wood: If you’re using wood, make sure it burns to glowing embers before you start cooking. Charcoal is a better option if you need consistent heat and easy temperature control.
    • Temperature Control: Use tongs, fire pokers, or a heat shield to adjust the fire’s intensity. Keep a close eye on the food to make sure it doesn’t burn.
    • Lid to Prevent Sparks: Many fire pit cooking setups come with a lid or spark guard. This is especially useful when cooking with oils, as it prevents any accidental splattering of hot oil that could cause flare-ups or burns.

    4. Fire Pit Cooking Accessories

    The right accessories can enhance your fire pit cooking experience and provide more flexibility:

    • Cooking Grates: A heavy-duty grill grate is one of the best accessories to have for cooking directly over the flame.
    • Pizza Ovens: Some fire pits come with add-on pizza ovens, which let you bake pizzas just like you would in a traditional oven but with the added flavor of wood smoke.
    • Cooking Skewers and Racks: For skewers or kebabs, get long skewers to keep your hands away from the fire. Roasting racks or grills can be used to cook larger pieces of meat or vegetables.
    • Fire Pit Tongs & Tools: Invest in fire pit tongs and other cooking tools that are long enough to keep you safe from the heat.

    5. Cleaning After Fire Pit Cooking

    After the fun is over, cleaning your fire pit is crucial to maintaining it in good condition for future use:

    • Ash Removal: Let the ashes cool down completely before cleaning them out. You can use a shovel or ash vacuum to remove them.
    • Grate Cleaning: Clean the grill grate by brushing it off with a wire brush to remove any food remnants, ensuring it’s ready for the next use.
    • Regular Maintenance: If your fire pit has cooking components, make sure to check for any signs of wear or damage regularly.

    Fire pit cooking is a rewarding experience that can elevate your outdoor gatherings to a whole new level. Whether you’re grilling, roasting, or cooking in cast iron, a fire pit is an excellent tool for preparing a variety of meals while enjoying the warmth and ambiance of a live fire. Always prioritize safety, use the right cooking accessories, and pay attention to the heat levels to ensure delicious, safe cooking. With the right setup and precautions, fire pit cooking can be a wonderful and memorable activity for family and friends.

  • How DIY Concrete Fire Pit Ideas

    How DIY Concrete Fire Pit Ideas

    Building a DIY concrete fire pit is a fantastic way to enhance your outdoor space and create a cozy, functional gathering spot for family and friends. Concrete fire pits are not only durable but also versatile, allowing you to customize the design to suit your preferences. Here’s a step-by-step guide to help you build your own concrete fire pit, along with key considerations for safety and durability.

    Key Considerations:

    • Safety: Before you start, ensure that the fire pit is placed in a safe location—far from trees, buildings, and anything flammable. Make sure that children and pets can’t easily access the fire pit area.
    • Utility lines: Contact your utility company to check for any underground utilities before digging. This is essential to avoid damaging water, gas, or electrical lines.
    • Solid foundation: The ground for your fire pit should be solid and level to ensure stability.

    Materials and Tools Needed:

    • Wooden planks (for the form)
    • Metal rebars (for reinforcement)
    • Concrete mix (sand, gravel, and cement)
    • Gravel (for filling inside the pit)
    • Decorative rocks (for finishing touches)
    • Paint or spray (to mark the area)
    • Shovel and tamper (for digging and compacting the ground)
    • Drill (to create holes for rebars)
    • Wire and matting (optional for extra reinforcement)

    Step-by-Step Guide to Build a DIY Concrete Fire Pit:

    Step 1: Prepare the Site

    • Choose a location: Find a safe, level area for your fire pit, away from trees and buildings. The ground should be solid and compact to avoid sinking over time.
    • Mark the area: Use spray paint or markers to outline the size and shape of your fire pit. This will help ensure accurate measurements during construction.

    Step 2: Build the Form

    • Create the form: Use wooden planks to create both the interior and exterior molds for the fire pit. The exterior form will be the outer wall, and the interior form will create the hollow space where the fire will burn.
    • Reinforcement: Place metal rebars vertically at the corners of the form and add horizontal pieces between them to create a sturdy structure. This reinforcement will add strength to the concrete and prevent cracking over time.
    • Wire and matting: If needed, you can add wire mesh or matting inside the form to provide additional support.

    Step 3: Prepare the Concrete Mix

    • Mix the concrete: Combine sand, crushed stone, and cement in the correct proportions. The mixture should be thick enough to hold its shape when poured but not too dry.
    • Pour the concrete: Fill the space between the forms with the concrete mix, making sure it’s evenly distributed. You may need to tap the sides of the form to remove air bubbles.
    • Level the surface: Use a board or trowel to smooth the top of the concrete to the desired level.

    Step 4: Allow the Concrete to Set

    • Let the concrete set for at least 24 hours to allow it to harden properly. Depending on the weather, it may need longer to fully cure. Avoid disturbing the concrete during this time to prevent cracks.

    Step 5: Remove the Form

    • After the concrete has set, carefully remove the wooden form. Be gentle during this process to avoid damaging the edges of the fire pit.
    • Inspect for defects: Concrete can sometimes have minor defects, so inspect your pit for any cracks or imperfections. These can sometimes be repaired with touch-up work if necessary.

    Step 6: Add Final Touches

    • Fill with gravel: Once the concrete structure is ready, fill the bottom of the fire pit with gravel. This helps with drainage and heat distribution. Aim to fill about three-fourths of the fire pit’s volume with gravel.
    • Install the fire pit bowl: If you’re using a DIY concrete fire pit bowl, place it into the center of the pit. This bowl acts as the actual fire-burning container.
    • Decorative rocks: Fill the space between the fire pit bowl and the concrete walls with decorative rocks or lava stones to finish off the design. These rocks add to the visual appeal and can also help contain the fire.

    Step 7: Ready to Use!

    • Once your DIY concrete fire pit is complete and the finishing touches are in place, you can immediately start enjoying it. Gather your friends and family for a cozy evening around the fire.

    Tips for Longevity:

    • Cover your fire pit when not in use to protect it from the elements, especially rain, which can cause concrete to degrade over time.
    • Regular maintenance: Check the fire pit regularly for cracks or damage. If you notice any issues, repair them promptly to avoid further damage.
    • Fuel: For the best experience, use fire-safe logs or fire pit-friendly fuel. Avoid using wet or untreated wood, as it may release harmful chemicals and create excess smoke.

    Building a DIY concrete fire pit is an enjoyable and rewarding project that adds both functionality and aesthetic appeal to your outdoor space. With careful planning, the right materials, and a bit of effort, you can create a beautiful and durable fire pit that will be a focal point for years to come. Enjoy your new fire pit and the warmth it provides for family gatherings, parties, and cozy evenings!

  • DIY Gas Fire Pit Creative Way

    DIY Gas Fire Pit Creative Way

    A DIY gas fire pit can be a fantastic addition to your backyard, offering both warmth and ambiance with an easy-to-maintain setup. Not only are gas fire pits efficient, but they are also cleaner and often safer than traditional wood-burning fire pits, as they require no wood or messy ash cleanup. Let’s walk through the key steps and considerations for building a DIY gas fire pit.

    Key Considerations for Building a DIY Gas Fire Pit:

    1. Safety First:
      • Always prioritize safety. Ensure that your gas fire pit is installed in a well-ventilated area, far from trees, branches, bushes, or any flammable objects.
      • Have fire prevention equipment on hand, such as fire extinguishers, a hose, or a bucket of sand, especially if you’re working with gas.
    2. Proper Materials:
      • Gas components: It’s important to purchase the right components, such as a gas burner, gas lines, and a propane tank (if using propane) or natural gas supply (if available). Don’t attempt to make these parts yourself, as improper installation could lead to dangerous outcomes like explosions or leaks.
      • Always buy from a trusted supplier or specialized online service to ensure you’re getting safe, certified parts for the job.
      • Firebricks: Use firebricks for building the fire pit walls. Firebricks are designed to withstand high temperatures and are perfect for creating a durable and safe structure around the gas burner.
    3. Designing Your Gas Fire Pit:
      • Glass box: For a modern and sleek look, you can build your fire pit using a glass box or concrete bowl. The glass allows you to enjoy the view of the flames while protecting the surrounding area from direct exposure to heat.
      • Brick design: If you prefer a more traditional look, you can build the walls using firebricks. A round or square shape works well for most gas fire pits, but you can also get creative with custom shapes.
      • Hole for the gas pipe: Make sure to leave space for a gas line. If using firebricks, create a hole in one brick to accommodate the gas pipe. This ensures the gas flows properly to the burner.

    Step-by-Step Guide to Building a DIY Gas Fire Pit:

    1. Choose the Location

    • Find a flat, level area for your fire pit. Ensure the area is at least 10 feet away from any structure, trees, or other potential hazards.
    • Avoid placing the fire pit under overhanging branches or close to any flammable materials.

    2. Prepare the Foundation

    • Dig a hole: Start by digging a shallow hole (about 4-6 inches deep) where you want to place the fire pit. This helps with stability and ensures that the structure is secure.
    • Gravel layer: Add a layer of gravel at the bottom of the pit for drainage. This ensures that water doesn’t accumulate in the base and damage your fire pit over time.

    3. Build the Walls

    • Use firebricks: Stack firebricks in a circular or square formation to build the walls of your fire pit. Firebricks can withstand high temperatures, making them perfect for this type of construction.
    • No mortar required: While mortar can be used, many DIY enthusiasts prefer dry-stacking the bricks for easier repairs and adjustments.
    • Leave a gap: Ensure that you leave a gap for the gas line to pass through. If you’re using bricks, make sure one brick has a hole to accommodate the gas pipe.

    4. Install the Gas Burner

    • Place the gas burner: Position the gas burner at the center of your fire pit. The burner will connect to the gas line and be the source of the flame.
    • Gas line connection: Use a certified gas line to connect your burner to the propane tank or natural gas source. Be sure to follow safety guidelines and check for leaks after installation.

    5. Add Decorative Materials

    • Lava rocks or glass beads: Once your gas burner is in place, you can cover the top of the pit with lava rocks or fire glass. These materials will help distribute the heat and create an attractive flame effect.
    • Glass box option: If you’re using a glass box for the design, place the burner inside and use the glass to contain the fire while still offering a great view.

    6. Test the Fire Pit

    • Before using the fire pit, test it to ensure that the gas is flowing properly and that there are no leaks.
    • Turn on the burner and check if the flames are steady and consistent. Adjust the flame height as necessary.

    Additional Safety Tips:

    • Regular inspections: Always inspect your gas fire pit regularly for signs of wear, leaks, or damage.
    • Gas shut-off valve: Ensure that your gas fire pit has an easily accessible shut-off valve in case of emergencies.
    • Cover your pit: When the fire pit is not in use, cover it to protect it from the elements and extend its lifespan.
  • Facts How to Build a Brick Fire Pit for You

    Facts How to Build a Brick Fire Pit for You

    Building a brick fire pit is a rewarding project that brings warmth, beauty, and a cozy space for your backyard gatherings. Below is a detailed guide to help you create your own brick fire pit with ease and safety, ensuring it lasts for many years.

    Materials Needed:

    • Firebricks (specially designed to withstand high temperatures)
    • Gravel (for the base layer)
    • Concrete mix (for the foundation)
    • Spray paint (to mark circles for layout)
    • Non-flammable decorative materials (like pebbles, gravel, or stone for decorative finishes)
    • Optional materials: glass (if you want to add a unique touch)

    Tools Required:

    • Shovel (for digging the pit)
    • Wheelbarrow (to move materials like gravel and concrete)
    • Hand tamper (for compacting gravel and concrete)
    • Measuring tape or string (to measure and mark layout)
    • Jigsaw (optional, if cutting bricks is necessary)

    Step-by-Step Instructions:

    1. Plan Your Design and Mark the Area

    First, it’s important to visualize your design. Draw the project on paper to determine the dimensions and shape of your fire pit. The most common design is a circular fire pit, but you can also create a square or rectangular one, depending on your preferences.

    • Mark the circles: Use a string tied to a central point to help you measure the inner and outer circles. The inner circle should be the size of the fire pit, and the outer circle is where the brick walls will go. Keep a 12-inch gap between the inner and outer circle.
    • Use spray paint: Spray paint the layout on your backyard to ensure accurate measurements.

    2. Dig the Hole

    Once your layout is marked, it’s time to dig the hole:

    • Dig the center: Start by digging out the inner circle to a depth of about 6-12 inches. Make sure the bottom of the hole is level.
    • Dig the outer area: Dig around the outer circle, which should be deeper than the inner circle to create a stable base for the fire pit. The depth of this trench can vary depending on your design, but 8-10 inches should be adequate.

    3. Prepare the Foundation

    After digging the hole, it’s time to lay the foundation.

    • Fill the bottom: Spread a layer of gravel at the bottom of the hole for proper drainage. This helps prevent water from collecting in the fire pit and also provides a solid base for the construction.
    • Mix concrete: Prepare a concrete mix and pour it in the space between the inner and outer circles to form the foundation. Use the hand tamper to compact the concrete, ensuring it’s level and smooth.

    4. Build the Outer and Inner Walls

    Once the foundation is set, you can start building the fire pit walls using firebricks.

    • Outer wall: Begin by laying the firebricks along the outer circle. If you prefer, you can use mortar between the bricks to hold them in place, but it’s possible to build a stable fire pit without mortar as well. Some people prefer a dry stack method to make repairs easier down the line.
    • Inner wall: Build the inner wall of the fire pit with firebricks as well. The inner wall should have a slightly smaller diameter than the outer wall to create a comfortable, contained space for the fire. The height of the walls should be about 12-18 inches, but it can vary based on personal preference.

    5. Let the Walls Set

    Once the walls are built, leave them to set for a few hours or overnight, depending on whether you’re using mortar or just dry stacking the bricks. The walls need time to stabilize before moving on to the next steps.

    6. Install the Fire Pit

    Now that your foundation and walls are set, you can place the fire pit into the center. If you’re using a metal insert or a pre-made fire pit, make sure it fits snugly inside the brick walls.

    7. Decorative Finishing

    For the finishing touches, add non-flammable decorative materials between the inner wall and the fire pit itself. This can include rocks, stones, or gravel to make the space look visually appealing. This layer also provides additional insulation and helps protect the fire pit from direct contact with the surrounding bricks.


    Final Tips:

    • Safety: Always ensure that your fire pit is placed a safe distance from trees, structures, or anything flammable. Make sure the area is clear of debris before using the fire pit.
    • Ventilation: If you decide to build a closed fire pit with a lid or covering, be sure there’s proper ventilation to prevent smoke buildup.
    • Cover the Pit: When not in use, it’s advisable to cover your fire pit to protect it from rain and moisture, especially if you’ve used mortar, to avoid any water damage.
  • Ease Way DIY Fire Pit Table Project

    Ease Way DIY Fire Pit Table Project

    Creating a DIY fire pit table is a fantastic way to add both functionality and style to your outdoor space. By making your own fire pit table, you get to customize it to your desired look and size, creating a unique piece for your backyard. Here’s a step-by-step guide for creating a wooden fire pit table top, which is not only practical but also aesthetically pleasing.

    Materials and Tools Needed:

    Materials:

    • Wooden boards (choose a durable wood like cedar, pine, or redwood)
    • 2 lengths of screws (appropriate size for securing boards)
    • Metal and wood brackets
    • Stain and paint for finishing
    • Wood conditioner (optional but recommended for better stain adhesion)
    • Polyurethane (for waterproofing)

    Tools:

    • Jigsaw (for cutting the wood)
    • Electric drill (for drilling holes and screwing the brackets)
    • Palm sander (for smoothing the wood)
    • Tape measure (to check dimensions)
    • Pencil (for marking cuts)

    Step-by-Step Instructions:

    1. Prepare the Wooden Boards

    First, you need to select and prepare the wooden boards. The boards should be long enough to form the top of the fire pit table. Measure the diameter of your fire pit to make sure the boards fit snugly around it. It’s important to plan for a wooden top that covers the fire pit while leaving enough space around the edges for safety.

    2. Cut the Boards to Size

    Next, line the boards up side by side around the fire pit. Using a jigsaw, cut the boards to the approximate size of the fire pit top. Make sure that the cuts are accurate to avoid sharp edges or uneven lines that could disrupt the look of the table.

    3. Mark the Center for the Circle

    Nail a string or a small piece of wood in the center of your fire pit, where the fire pit’s reservoir or cooking area is. This will act as a guide for marking the circle on your wooden top. The string helps you draw a perfect circle. Use a pencil to trace the circle, ensuring that the top of the fire pit is covered evenly.

    4. Assemble the Table Top

    Once your circle is marked, begin screwing the wooden boards together. Use wood brackets to hold the boards in place and metal brackets to provide extra stability. Use the longer screws for the wood brackets and shorter screws for the metal ones. Tighten everything securely with your electric drill.

    5. Cut Out the Circle

    After the assembly, take your jigsaw and carefully cut along the pencil mark to create the circular shape. Go slow and steady for a clean, smooth cut. You can adjust the edges afterward to ensure that the circle is even.

    6. Sand the Edges

    Once you have the circle cut out, use a palm sander to smooth the edges. Sand the top of the wooden boards as well, ensuring there are no splinters or rough patches. The smoother the surface, the better the finish will be.

    7. Apply Wood Conditioner (Optional)

    To help the stain adhere better and to improve the overall finish, apply a thin layer of wood conditioner. This is especially important if you are using a softer wood like pine. Allow the conditioner to dry before proceeding to the next step.

    8. Staining and Sealing

    Now it’s time to add color and protect your wood. Apply a coat of stain to the top, making sure to cover all exposed areas. Let the first coat dry, then apply a second coat for a deeper color and more protection. To ensure durability, finish with a coat of polyurethane to seal the wood and improve its waterproof qualities. This is crucial because the wooden top will be exposed to the elements.

    9. Final Assembly

    Once the stain and polyurethane are completely dry, your wooden fire pit table top is ready to be used. Simply place it on top of your fire pit, ensuring it fits securely and sits comfortably around the fire pit.


    Additional Tips:

    • Safety First: Always ensure your fire pit is set up in a safe location, away from overhanging trees, buildings, or anything else that could catch fire. A fireproof surface or a heat-resistant mat underneath the fire pit can add an extra layer of protection for your lawn or patio.
    • Weather Protection: If your DIY fire pit table will be exposed to rain or other harsh weather conditions, consider adding a removable cover for extra protection when it’s not in use.
    • Decorative Options: Feel free to get creative with the finish and decorative elements. You can paint the table to match your backyard’s theme, add some outdoor cushions, or even incorporate tile patterns around the edges for a more refined look.
  • Creating a Homemade Fire Pit for Your Cottage: A Retro and Functional Addition to Your Backyard

    Creating a Homemade Fire Pit for Your Cottage: A Retro and Functional Addition to Your Backyard

    A homemade fire pit can bring a retro charm to your cottage or backyard, adding warmth, style, and functionality to your outdoor space. Whether you’re hosting summer barbecues with friends or just enjoying the warmth of a crackling fire, a DIY fire pit is a fantastic way to create a cozy atmosphere while enhancing your garden’s aesthetic.

    Why Opt for a Homemade Fire Pit?

    • Affordable and Customizable: You can design your fire pit to match your taste, choosing materials and size that work best for your space.
    • Aesthetic Appeal: A well-constructed fire pit is more than just a functional outdoor feature; it can also be a beautiful addition to your garden that becomes a focal point for gatherings.
    • Practicality: Beyond its visual appeal, a fire pit provides warmth during cool summer nights, is perfect for roasting marshmallows or cooking meat, and creates a wonderful ambiance for evening get-togethers.

    Step-by-Step Guide to Building Your Own Fire Pit

    1. Choose the Right Location

    The first step is selecting a safe and functional location for your fire pit:

    • Distance from Structures: Place the fire pit at least 10 feet away from any structures, such as houses, fences, trees, or sheds. This reduces the risk of sparks or embers catching nearby objects on fire.
    • Avoid Low-Lying Areas: Don’t place the fire pit in a flood-prone area, as rainwater could flood it and extinguish the fire.
    • Flat, Level Ground: Ensure the ground is level and stable for the construction of your fire pit. It should also be large enough to accommodate the fire pit and seating for guests.

    2. Determine the Shape and Size

    While fire pits can come in many shapes and sizes, the most common and functional design is round, which allows for even heat distribution and provides a natural, cozy gathering space.

    • Recommended Size: The ideal diameter for a DIY fire pit is around 90-110 cm (about 36-44 inches). This is large enough to create a substantial fire but small enough to ensure people can sit comfortably around it.

    3. Gather Materials

    • Fire-Resistant Stone or Brick: Opt for heat-resistant materials like stone, concrete, or fire bricks. These materials will withstand high temperatures and provide a sturdy structure for the fire pit.
    • Gravel or Sand: For the base, you’ll need gravel or sand to create proper drainage and prevent water buildup.
    • Shovel and Trowel: To dig and level the ground for your pit.
    • Optional: Concrete blocks or pre-cast stones for a more decorative, easy-to-assemble structure.

    4. Dig the Hole

    • Excavate a Hole: Start by digging a shallow hole in the center of your marked area. Aim for a depth of about 6 inches. The hole will be the base of your fire pit.
    • Shape the Pit: After digging, shape the edges of the hole into a circular or slightly curved shape to ensure the stone walls will fit snugly around the pit.

    5. Lay the Base Layer

    • Gravel or Sand Layer: At the bottom of the hole, create a layer of gravel or sand. This will help with drainage and prevent the fire pit from filling with water during rainfall.
    • Level the Surface: Use a trowel or shovel to level the gravel or sand, ensuring the base is even.

    6. Build the Walls

    • Start with the First Layer: Begin by laying your first layer of fire-resistant stone, brick, or concrete blocks around the pit’s perimeter. Make sure the stones or bricks are level and snug against one another.
    • Stack Layers: Continue stacking the materials, ensuring each layer is secure and properly aligned. You can use heat-resistant mortar or adhesive between the layers for added stability, or leave the stones stacked loosely for a more rustic look.
    • Wall Height: Aim for a wall height of 12-18 inches. This height is perfect for controlling the fire while also providing a safe and comfortable space for sitting around it.

    7. Finish with a Decorative Touch

    To give your fire pit a personal touch:

    • Add Stone or Tile Around the Exterior: You can place decorative stone or tile around the fire pit’s perimeter for an added design element.
    • Paint the Exterior: If you’re using concrete blocks, you can paint them with heat-resistant paint to give your fire pit a pop of color that matches your garden décor.

    8. Test Your Fire Pit

    Once you’ve completed the structure, it’s time to test your fire pit:

    • Start a Small Fire: Light a small fire in the pit to ensure everything is stable and functioning properly. Check for any issues, such as loose stones or inadequate airflow.
    • Adjust as Needed: If necessary, make any adjustments to the construction to ensure the fire pit is secure and safe to use.

    Tips for Making Your Fire Pit Even Better:

    • Seating Area: Create a comfortable seating area around the fire pit using outdoor furniture like benches, chairs, or even a built-in stone seating area.
    • Wind Protection: Consider adding some windbreaks around your fire pit, such as tall plants, shrubs, or a small screen, to keep the fire burning steadily.
    • Safety First: Always have a bucket of water or a fire extinguisher on hand when using the fire pit. Never leave the fire unattended.

    A homemade fire pit is a fantastic addition to your garden or backyard. Not only does it enhance the aesthetic appeal of your outdoor space, but it also provides warmth, a place for cooking, and a central gathering point for family and friends. With a few days of work, some basic materials, and a little creativity, you can build your own stylish and functional fire pit that will be the highlight of your summer evenings.

  • The Dakota Fire Pit: A Survivalist’s Secret to Efficient and Smokeless Heat

    The Dakota Fire Pit: A Survivalist’s Secret to Efficient and Smokeless Heat

    The Dakota Fire Pit is a unique and highly efficient outdoor fire-making technique that’s gaining popularity due to its practicality and fuel efficiency. Unlike conventional campfires, the Dakota Fire Pit uses a clever system of two interconnected holes that not only generate a more intense heat but also help eliminate smoke. This simple yet effective design makes it an ideal choice for campers, survivalists, or anyone looking to create a sustainable and smoke-free fire.

    How the Dakota Fire Pit Works

    The Dakota Fire Pit consists of two holes that are dug into the ground, with one acting as the main fire pit and the other serving as an air intake. These holes are positioned around 7 inches apart to allow the second hole to draw in oxygen and push the smoke out of the fire. This design increases the combustion rate, making the fire burn hotter and more efficiently than a traditional fire pit. As a result, you can cook more effectively with less wood, saving both fuel and time.

    This method works by creating a draft system that supplies oxygen to the fire, intensifying the heat. The deeper the holes, the more effective the system becomes. The lack of smoke also reduces the risk of attracting unwanted attention, making it ideal for discreet outdoor activities, such as camping, hunting, or survival situations.

    Key Benefits of the Dakota Fire Pit

    1. Smokeless Design
      One of the standout features of the Dakota Fire Pit is its smokeless nature. Traditional campfires can produce a lot of smoke, which can be unpleasant and may even be dangerous in certain survival scenarios. With the Dakota Fire Pit, the second hole helps draw smoke away from the fire, creating a cleaner, more breathable environment. This is especially useful if you’re trying to avoid detection in the wild.
    2. Efficient Fuel Usage
      Because the Dakota Fire Pit burns hotter than a standard campfire, it uses significantly less wood. The improved combustion process means that you can cook or stay warm with much less fuel, which is crucial when resources are limited.
    3. Compact and Easy to Build
      The Dakota Fire Pit is incredibly simple to construct. You don’t need any specialized materials or tools—just a basic digging tool like a stick or shovel and some ingenuity. You’ll need to dig two holes: one for the fire and one for the air intake. This makes it an excellent option for survivalists or anyone looking for a quick and effective way to create a fire without relying on complex equipment.
    4. Ideal for Cooking
      Due to its intense heat, the Dakota Fire Pit is perfect for cooking in outdoor or field conditions. It provides a concentrated and stable source of heat, making it ideal for preparing meals while camping or surviving in the wilderness. Whether you’re boiling water, roasting meat, or cooking over the fire, the Dakota Fire Pit ensures that the process is efficient and effective.
    5. Survival Situations
      The Dakota Fire Pit is a must-know technique for survival enthusiasts. In a pinch, this method can help provide warmth, heat food, and even purify water in the wild. It is especially beneficial in colder environments where staying warm is a priority. Additionally, the construction of the Dakota Fire Pit requires very little in terms of materials, making it an invaluable skill when living off the land.
    What is a Dakota Fire Pit

    How to Build a Dakota Fire Pit

    Building a Dakota Fire Pit is easy and can be done with minimal tools and materials. Here’s a basic guide on how to construct it:

    1. Find a Suitable Location
      Look for a flat, safe spot to build your Dakota Fire Pit. Avoid areas with dry vegetation or anything flammable nearby.
    2. Dig the Main Fire Pit
      Dig a small hole, roughly 12 to 18 inches deep, for your fire. This is where the flames will burn.
    3. Dig the Intake Hole
      About 7 inches away from the main fire pit, dig a second hole that is about 6 to 8 inches deep. This hole will serve as the air intake, drawing oxygen to fuel the fire.
    4. Connect the Two Holes
      Use a stick or shovel to create a small trench between the two holes. The intake hole should be positioned to direct oxygen into the fire, which will make it burn hotter and more efficiently.
    5. Start the Fire
      Begin by lighting the fire in the main pit, and the intake hole will provide the necessary airflow to keep the fire burning strong. Adjust the depth of the intake hole if needed to control the flow of oxygen.
    6. Cooking and Heat
      Once the fire is established, you can cook your meals or use the heat to stay warm. The temperature of the fire will be significantly higher than that of a traditional campfire, so it will cook food faster and with less wood.

    A Must-Know Technique for Survivalists

    While the Dakota Fire Pit may not be suitable for regular home use, it’s a game-changer for those spending time in the wilderness. Whether you’re out in the wild or in a survival situation, this clever design offers a highly efficient and discreet way to make fire. You don’t need special equipment or advanced skills—just a bit of effort and a willingness to adapt to nature’s needs.

    For those interested in learning more, there are numerous video guides and tutorials available online that explain how to set up and use the Dakota Fire Pit, including adaptations for specific situations like shelter building.

    In conclusion, the Dakota Fire Pit is a practical, cost-effective, and smokeless way to build fire. Whether you’re out camping, cooking, or preparing for an emergency, this innovative fire-making technique could be a lifesaver. It’s simple, effective, and provides all the warmth and cooking ability you need without the hassle of a traditional fire.Attach

    Search

    Reason

  • The Swedish Fire Log: A Multifunctional Outdoor Tool for Cooking and Illumination

    The Swedish Fire Log: A Multifunctional Outdoor Tool for Cooking and Illumination

    The Swedish fire log, also known by names like “primus wooden”, “Swedish fire”, or “Finnish candles”, is a versatile and ancient outdoor tool that serves multiple purposes. Whether you need to cook food, light your way, or simply keep warm during chilly outdoor adventures, the Swedish fire log is an ideal solution. It offers a practical and efficient way to utilize wood for heat and light, all while being easy to build and maintain.

    Choosing the Right Wood for Your Swedish Fire Log

    While there are no strict rules about the type of wood used for a Swedish fire log, it’s important to consider the characteristics of different timber types. For example:

    • Spruce and Pine: These woods tend to “pop off” and spark a lot, which can be entertaining but also makes them less suited for calm, sustained heat.
    • Birch: A good option for a fire log as it lights easily and provides steady warmth. However, it tends to crackle toward the end of its burn, which might be distracting.
    • Aspen: The most ideal choice, as it burns smoothly, producing a steady and moderate flame without excessive cracking or popping. Aspen also creates an efficient heat source.

    Regardless of the wood you choose, it’s essential that it be dry but not decayed, as this ensures a clean and consistent burn. Fresh wood that is too damp can be difficult to ignite and may emit unpleasant smoke.

    How to Make Your Own Swedish Fire Log

    Creating a Swedish fire log is an easy and satisfying DIY project. Follow these simple steps to craft your own:

    1. Select Your Wood
      Choose a large, dry piece of timber, ideally around 25-50 cm (10-20 inches) in length. The diameter should be substantial enough to allow for several vertical cuts and provide a long burn time.
    2. Cut the Log
      Cut the log into quarters along its length, making three deep, evenly spaced cuts. These cuts should run from top to bottom but not all the way through the log—leaving about 2-3 cm (1 inch) at the bottom to keep the log intact. The number of cuts you make will depend on the size of your log, but the goal is to create several “segments” that will burn independently while staying connected.
    3. Secure the Pieces
      Bind the quarters together using wire, string, or even durable rope. The goal is to hold the sections tightly together, allowing for a stable structure that ensures good airflow. Proper airflow is essential for the fire to burn evenly, so avoid binding the quarters too tightly.
    4. Fill the Center
      Place small pieces of birch bark, dry twigs, or other fire-starting materials into the center of the log. These will act as kindling to get the fire going. Be sure to leave enough space for air to circulate, as restricting airflow will impede the fire’s performance.
    5. Fire Up Your Log
      To start the fire, soak the center of the log with a flammable liquid, such as lighter fluid, chainsaw oil mixed with petrol, or any other fire-starting fluid. Let it soak for a few minutes to ensure good ignition. Afterward, light the fire log using a match or lighter. Be prepared for the log to burn slowly and steadily, providing both light and heat.
    Swedish Fire Log Stove

    Using Your Swedish Fire Log: Cooking and Enjoying the Outdoors

    The Swedish fire log can be used for various outdoor activities, from cooking to simply enjoying a peaceful evening under the stars. Here’s how you can use it effectively:

    • Cooking: The Swedish fire log makes an excellent, compact cooking station. As the fire burns, it radiates heat, which is perfect for boiling water or cooking food over the flame. You can place a pot, kettle, or even a grill grate above the fire to prepare meals while enjoying the warmth of the log.
    • Illumination: If you’re in need of a portable light source, a Swedish fire log can also act as a torch, illuminating the surrounding area. The fire creates a gentle, flickering light that can help guide you on hikes or brighten up a campsite.
    • Heat: The slow, steady burn of the log makes it a reliable heat source for chilly nights in the wilderness or your own backyard. It’s a great alternative to a traditional campfire and can keep you warm for hours.

    Safety Tips for Using a Swedish Fire Log

    While the Swedish fire log is a simple and effective tool, it’s important to follow some safety guidelines:

    • Placement: Always use your fire log on a non-flammable surface, such as gravel or dirt. Avoid placing it directly on grass or wooden decking.
    • Supervision: Never leave the fire unattended. It’s important to monitor the log as it burns to prevent any accidental fires.
    • Wind and Weather: Be mindful of windy conditions, as the log can become a fire hazard if not properly controlled. Ensure the surrounding area is clear of flammable materials.

    Conclusion: A Practical and Fun Outdoor Essential

    The Swedish fire log is a multi-functional, eco-friendly tool that can add both warmth and functionality to your outdoor adventures. Whether you’re cooking a delicious meal, lighting your way on a hike, or simply enjoying a crackling fire, the Swedish fire log is a must-have for anyone who enjoys spending time outdoors. Easy to make and highly effective, this traditional yet simple tool is sure to enhance your camping experience or backyard gatherings. So, gather some dry wood, get crafting, and enjoy the warmth and light of your own Swedish fire log!