• Beach Fire Pit – is it That Good?

    Beach Fire Pit – is it That Good?

    The Ultimate Guide to Creating a Beach Fire Pit: A Perfect Seaside Retreat

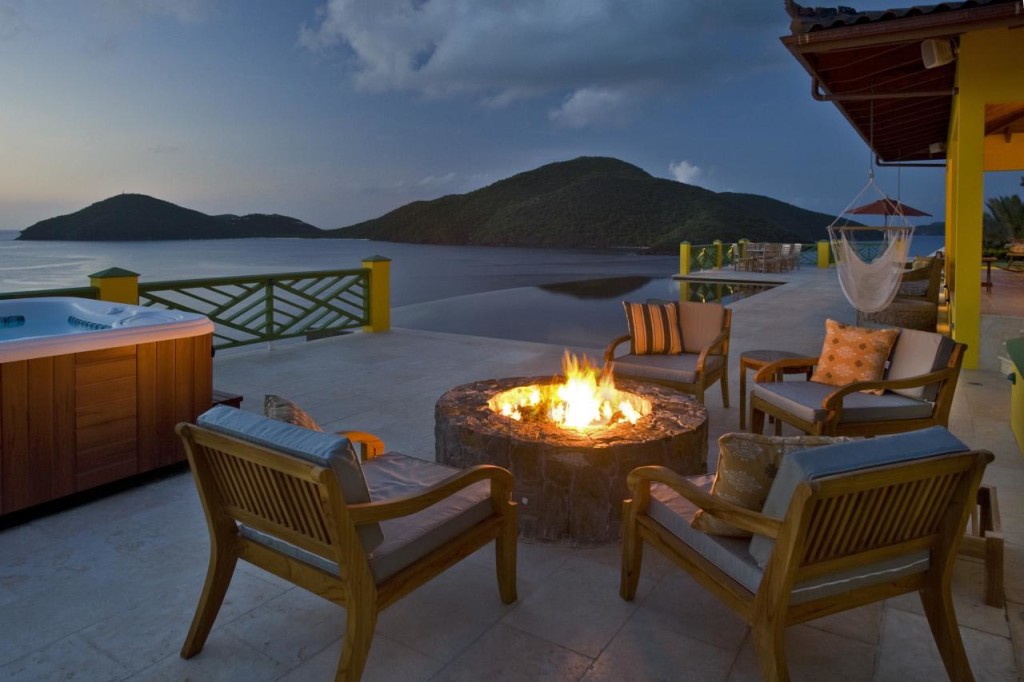
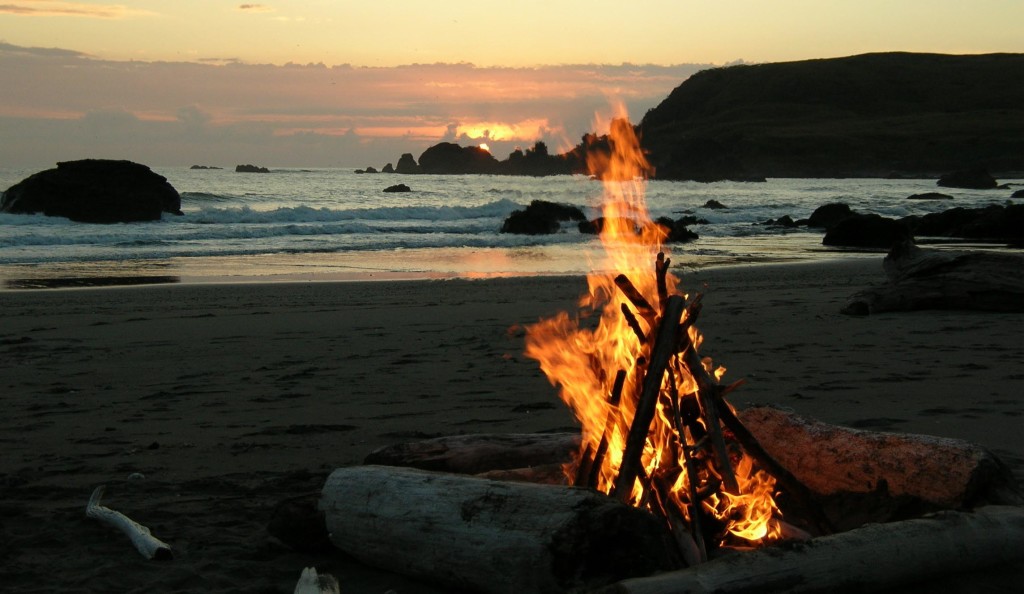
    There’s something magical about sitting around a fire on the beach, especially as the sun sets and the cool ocean breeze rolls in. Whether you’re lucky enough to live by the sea or are just dreaming about it, the idea of having a beach fire pit is one that evokes relaxation and warmth. After a busy week of work or a bustling city life, a fire pit on the beach is the ultimate escape into tranquility.

    The experience of enjoying the sound of crashing waves, feeling the sand between your toes, and basking in the glow of a fire is something everyone deserves. So, whether you’re planning a seaside vacation or simply dreaming of one, here’s everything you need to know about beach fire pits and how to create the perfect spot to unwind by the water.

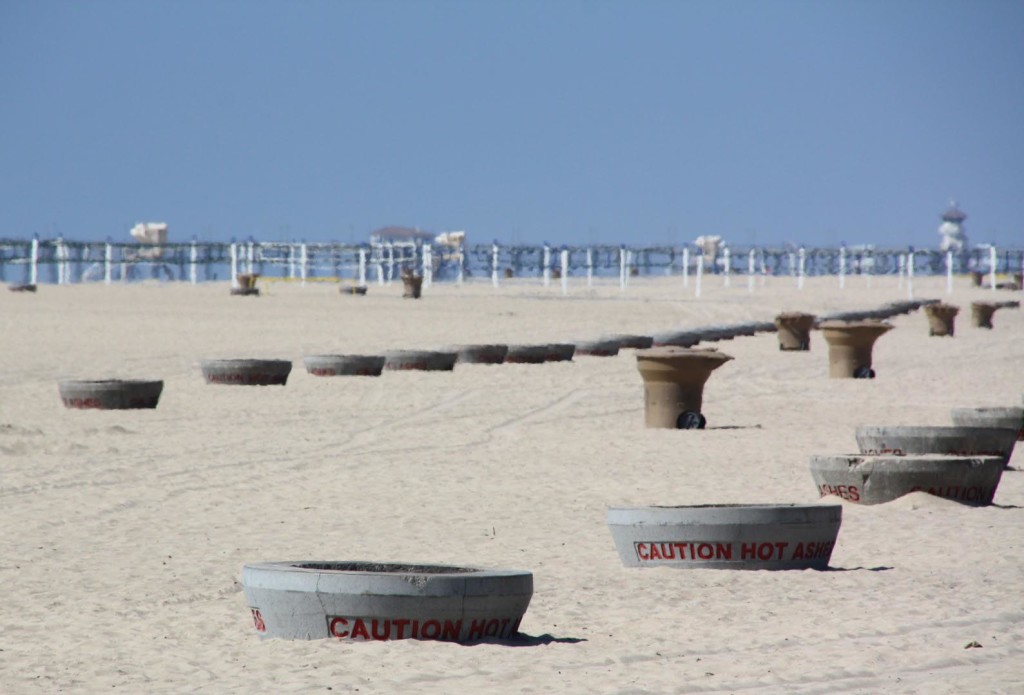
    Popular Beaches with Fire Pits

    While many beaches around the world boast stunning views and calming sounds, a few stand out for offering dedicated fire pits where you can relax and cook as the sun sets. Here are some beaches known for having excellent fire pit facilities:

    • California Beaches: California is home to some of the best beaches in the world, many of which offer designated fire pit areas. Whether you’re near the iconic Venice Beach or more serene spots like Carmel Beach, you’ll find that having a beach fire is a local tradition.
    • San Diego Seaboard: Known for its perfect weather year-round, San Diego is a haven for beachgoers. Many of the beaches here have fire pits that can be rented or used on a first-come, first-served basis, providing the ideal setting for evening fires with friends or family.
    • Bolsa Chica State Seashore: Located in Huntington Beach, this popular beach offers fire pits right by the water, allowing you to enjoy the stunning sunset while warming up by a crackling fire.
    • Huntington State Seashore: Another beautiful beach in Southern California, Huntington Beach is famous for its laid-back vibe and fire pits. Many visitors gather here to enjoy the waves during the day and spend their nights around the fire.

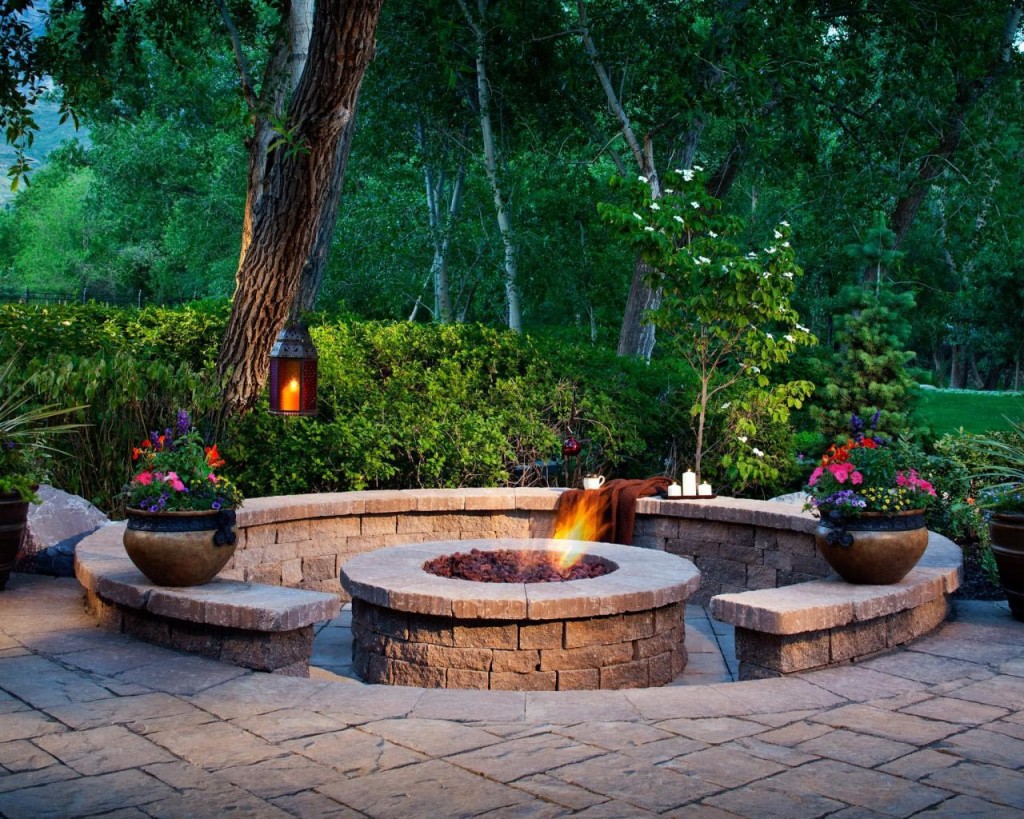
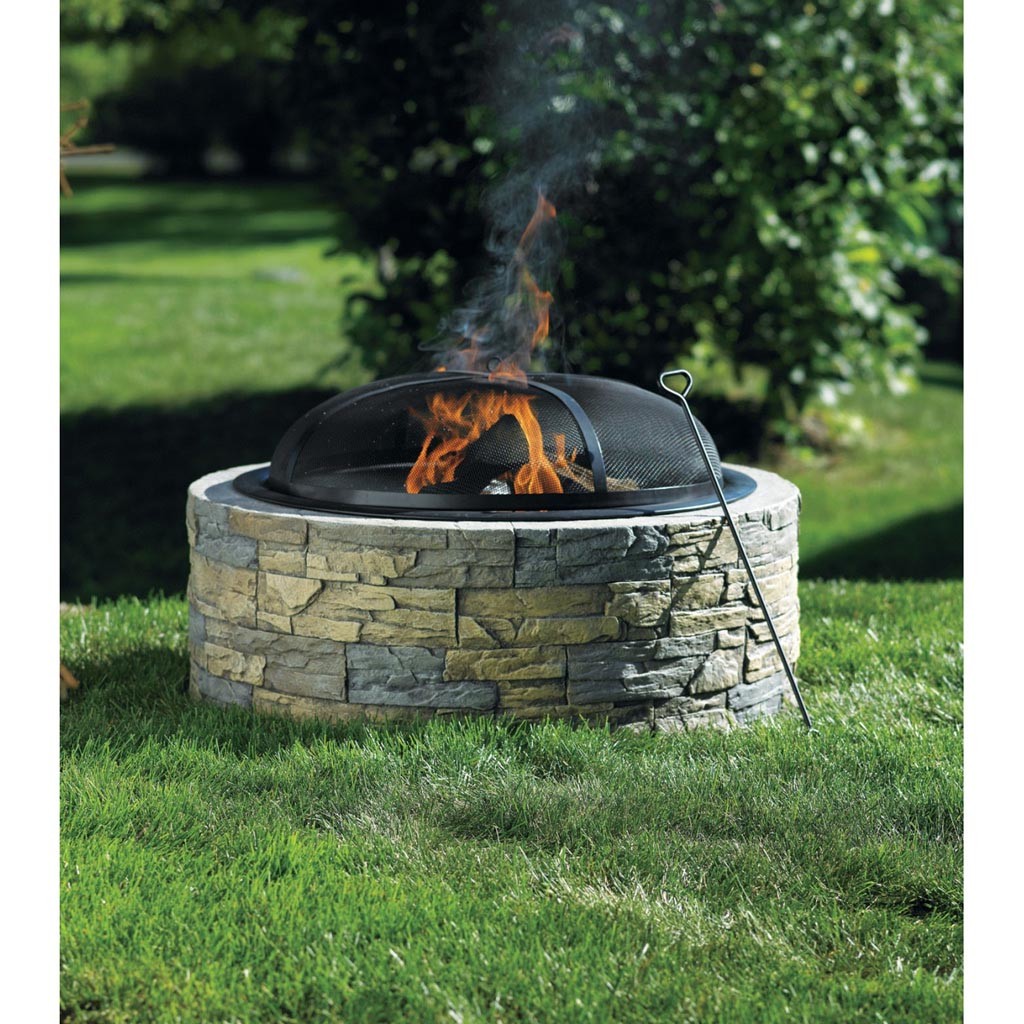
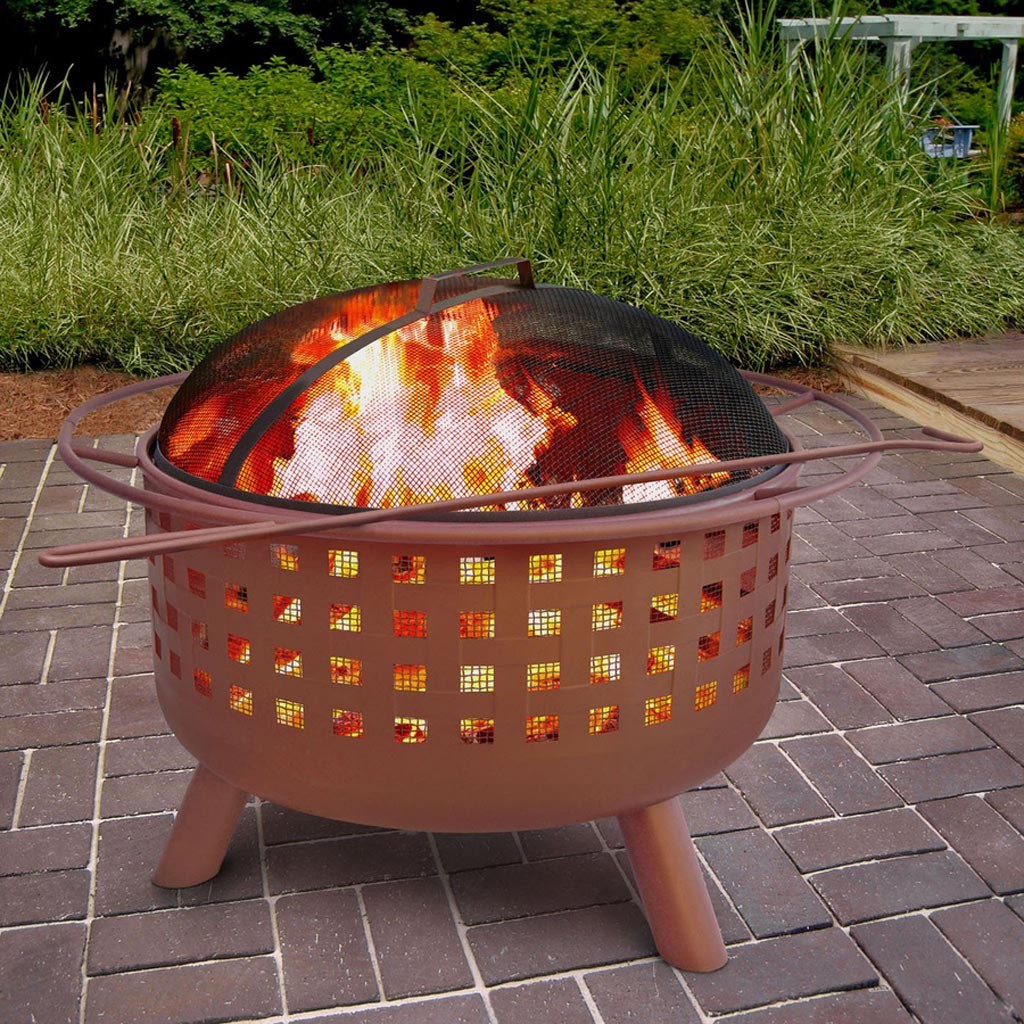
    How to Build Your Own Beach Fire Pit

    If you’re lucky enough to live near the beach or want to bring the feel of a beach fire pit to your backyard, you can easily create one. Here’s a simple guide for setting up your own beach-inspired fire pit:

    Materials Needed:

    • Bricks or pavers for lining the fire pit
    • Shovel or digging tools
    • Gravel or sand (for the base of the pit)
    • Fire-resistant stones or materials for the surrounding area
    What Beaches Have Fire Pits

    Step-by-Step Guide:

    1. Select a Safe Spot: Choose a spot away from wind-prone areas or close to flammable structures. Ideally, your fire pit should be positioned where it’s shielded from the wind, which can blow out the fire or make it dangerous. A sheltered spot is perfect, and you can even set up a tent or windshield around it for extra protection.
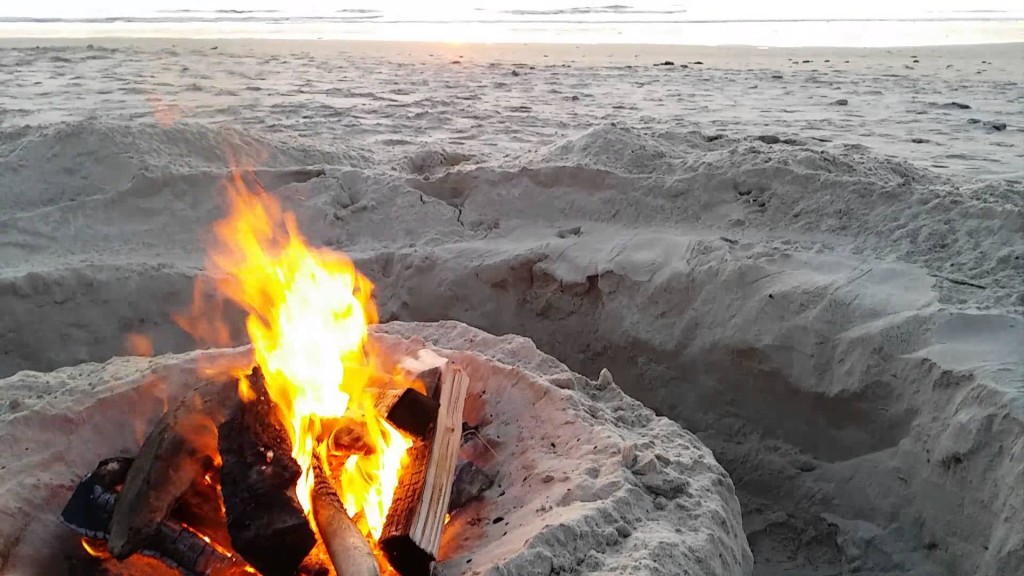
    2. Dig the Hole: Begin by digging a shallow hole for your fire pit. Make sure it’s deep enough to contain the fire safely but not too deep to make it difficult to access. A diameter of about 2 feet is a good size for a standard beach fire.
    3. Line the Pit with Bricks: Lay bricks or pavers vertically along the walls of the hole. This will help keep the fire contained and provide a visually appealing, rustic look. You can use cleaved pieces of tile or extra bricks to enhance the design.
    4. Create a Stable Base: Fill the bottom of the pit with gravel or sand to allow for proper drainage and air circulation. This will help the fire burn efficiently and ensure that the pit doesn’t become waterlogged.
    5. Design the Surrounding Area: Around the fire pit, consider adding additional pavers or stones to create a safe space for seating and to enhance the aesthetics of the area. Choose natural materials that blend with the beach vibe and maintain safety.
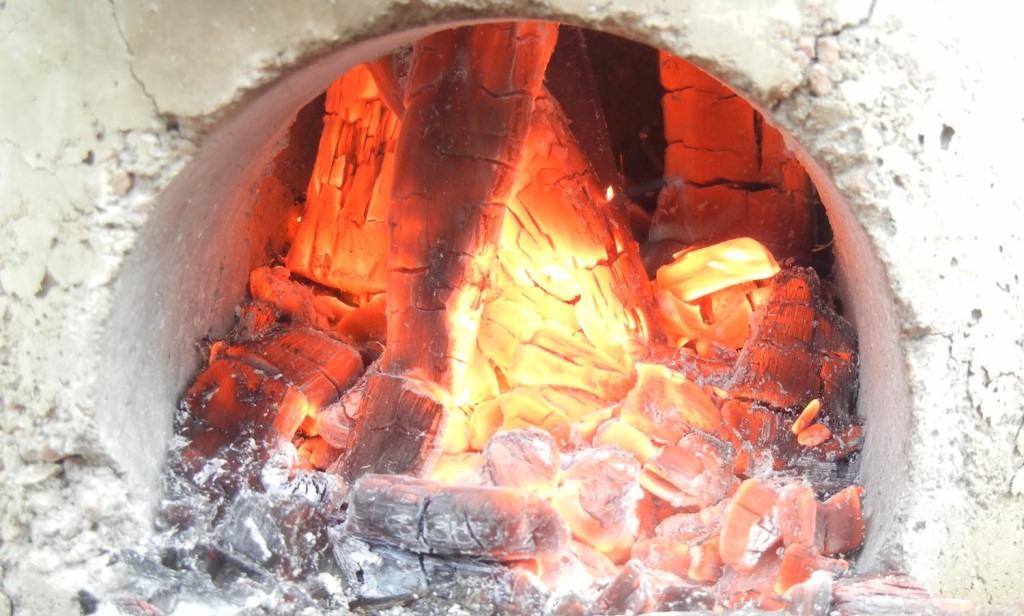
    6. Wood Selection: While wood for the fire should be chosen carefully, driftwood can make for a perfect beach fire fuel. However, use it sparingly, as driftwood can burn quickly. Consider bringing some wood along or using locally sourced timber that’s appropriate for beach fires. Always ensure that your fire is manageable and won’t endanger your surroundings.
    7. Accessorize: To make your beach fire pit more inviting, place some comfortable seating around the area. Consider adding beach chairs, throw blankets, and a small table for snacks or drinks. You might even want to add a grill or skewers to make it an excellent spot for cooking hot dogs or roasting marshmallows.
    Fire Pits Huntington Beach

    Benefits of a Beach Fire Pit

    A beach fire pit brings more than just warmth. It offers a multi-sensory experience that enhances your outdoor time. Here are some key benefits:

    1. Cooking: One of the best advantages of a beach fire pit is the ability to cook on it. Whether you’re grilling fresh seafood or roasting marshmallows, a fire pit provides the perfect setting for outdoor meals.
    2. Nighttime Chill Protection: Coastal areas can often get chilly at night, especially during the fall. A fire pit will keep you warm and comfortable as you enjoy the view of the ocean, stargaze, or chat with friends.
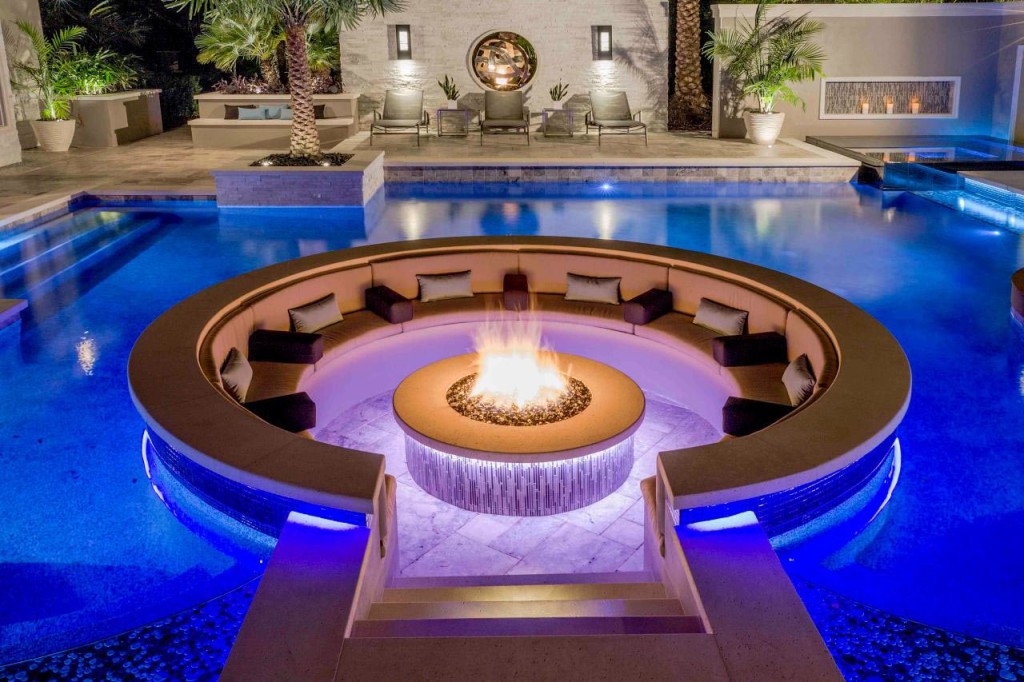
    3. Aesthetic Appeal: There’s nothing like the visual appeal of a fire crackling under the stars. A beach fire pit can transform any beach into a cozy, inviting atmosphere for you and your guests.
    4. Social Gathering: Whether you’re with family or friends, a fire pit naturally draws people together. It’s a great way to spend quality time in a beautiful, serene environment while enjoying the warmth of the flames.
    5. Wind Protection: The beach often experiences strong winds, which can blow out a regular campfire. By raising your fire pit off the ground and positioning it in a sheltered area, you can maintain a steady flame without the risk of it being extinguished by the breeze.

    A beach fire pit is the perfect way to make the most of your seaside retreat, offering a unique blend of warmth, beauty, and practicality. Whether you’re enjoying an evening with friends on the California coast or creating a beach-like atmosphere in your backyard, a fire pit brings people together for unforgettable moments. Follow these simple steps to set up your own fire pit, and you’ll be ready to enjoy cozy nights around the fire for years to come.

  • Transforming a Wheel Rim into a Unique Fire Pit: A Simple, Budget-Friendly Project

    Transforming a Wheel Rim into a Unique Fire Pit: A Simple, Budget-Friendly Project

    If you’re looking for a quick, cost-effective, and creative way to enhance your outdoor space, a rim fire pit is the perfect solution. Not only does it provide a charming and functional fireplace for your yard, but it’s also a fun DIY project that you can accomplish over a weekend or even in just a few hours. Using an old wheel rim, also known as a felly, you can create a rustic fire pit that will quickly become the center of attention during your outdoor gatherings.

    Whether you’re spending summer evenings around the fire with friends and family, or enjoying a quiet night under the stars, a wheel rim fire pit offers a safe, practical, and attractive addition to your outdoor area. Unlike traditional campfires, the rim design keeps the fire contained, protecting it from the wind while also adding a unique aesthetic to your space.

    Why Choose a Rim Fire Pit?

    A wheel rim fire pit provides several benefits:

    • Affordable: Using a discarded wheel rim (such as from a car, tractor, or truck) means that you won’t have to spend much money on materials. Many people have old rims lying around, and if not, they’re often easy to find for free or at low cost.
    • Easy to Build: This DIY project doesn’t require any special skills, and you can have it ready in no time. Plus, you can customize the look of your fire pit to fit your style.
    • Durable and Safe: Wheel rims are designed to withstand high pressure and heat, making them ideal for use as a fire pit. Unlike some other materials, they won’t melt under the intense heat of the flames.
    • Windproof: The metal rim is an excellent barrier against the wind, keeping the flame steady and preventing it from blowing out or spreading.

    How to Build Your Own Rim Fire Pit

    Here’s a step-by-step guide to help you create your very own wheel rim fire pit:

    Materials You’ll Need:

    • An old wheel rim (preferably from a truck or tractor)
    • Drill and drill bits
    • Heat-resistant paint (optional)
    • Rocks, bricks, or stones (for decoration and insulation)
    • Grate or skewers (for grilling)

    Steps to Create Your Fire Pit:

    1. Find the Right Rim: Start by selecting an old wheel rim that’s large enough to contain the fire. Tractor or truck rims are ideal due to their larger diameter. Avoid using aluminum rims, as they can melt under high heat.
    2. Drill Holes for Airflow: Using a drill, make several holes around the bottom of the rim. These holes will allow air to circulate, helping the fire burn more efficiently. The more airflow, the hotter and more consistent the flames will be.
    3. Optional: Paint the Rim: For added durability and a sleek finish, consider applying a coat of heat-resistant paint to your rim. This will protect the metal from rust and wear, while giving it a polished look.
    4. Dig the Pit: Choose a safe, flat location in your yard for the fire pit. Dig a small hole in the ground where you’ll place the rim. Make sure it’s far away from any trees, buildings, or other flammable materials.
    5. Secure the Rim: Place the wheel rim into the hole you’ve dug. You can bury it slightly or leave it raised, depending on your preference. The rim should be stable and secure to ensure safety during use.
    6. Add Decorative Rocks or Bricks: Surround the rim with rocks, bricks, or stones to create a rustic, visually appealing look. This also helps retain heat and adds a decorative touch. You can even stack the stones higher if you prefer a taller fire pit.
    7. Add a Grill or Skewers: For those who enjoy cooking outdoors, you can place a grill or set of skewers on top of the rim to roast marshmallows, cook hotdogs, or prepare a full meal over the fire.
    8. Arrange Seating: Surround the fire pit with comfortable seating, such as chairs or benches, and create a cozy space to relax and enjoy the warmth of the fire.

    Additional Tips:

    • Safety First: Always ensure your fire pit is a safe distance from any structures, trees, or other flammable materials. It’s also important to have a fire extinguisher or a bucket of water nearby just in case.
    • Customization: If you want to make your fire pit even more unique, consider adding decorative elements like tiles or a built-in stone seating area.
    • Maintenance: Clean your fire pit regularly to prevent the buildup of ash, and always make sure the fire is completely out before leaving it unattended.

    Conclusion

    A wheel rim fire pit is a fantastic way to create a permanent, budget-friendly fireplace for your outdoor space. It’s simple to build, requires minimal materials, and offers a safe, functional, and stylish way to enjoy the warmth and ambiance of a fire. Whether you’re hosting a barbecue or simply relaxing with loved ones, this DIY project can be completed in just a few hours and will provide countless evenings of enjoyment. Plus, it’s a sustainable and eco-friendly option, as you’re giving a second life to an old, unused item. With just a few basic tools and materials, you’ll have a cozy and inviting fire pit that enhances your backyard for years to come.

  • The Rise of Indoor Fire Pits: A Cozy Addition to Your Home

    The Rise of Indoor Fire Pits: A Cozy Addition to Your Home

    While outdoor campfires are a classic part of any outdoor recreation, advancements in technology have allowed for the creation of indoor fire pits, offering a similar warmth and ambiance but within the comfort of your home. Whether you’re looking for a new way to add warmth, create an inviting atmosphere, or simply enjoy a flame indoors, an indoor fire pit can be the perfect solution. Not only do they provide an aesthetically pleasing focal point, but they also come with several benefits that make them increasingly popular in modern homes.

    Why Choose an Indoor Fire Pit?

    One of the biggest advantages of an indoor fire pit is that it allows you to enjoy the comforting ambiance of a fire without worrying about the weather. Whether it’s a chilly winter evening or a rainy day, you can always enjoy the cozy warmth and flickering flames indoors. Here are some reasons why homeowners are turning to indoor fire pits:

    • Consistent Warmth: Unlike outdoor campfires, which are weather-dependent, an indoor fire pit provides consistent warmth, making it a great addition during colder months.
    • Decorative Appeal: The beauty of a live flame adds a magical, calming atmosphere to your home, making it a centerpiece that captures attention and sparks conversation.
    • Versatility: Many indoor fire pits are not just about the flame. You can use them to roast marshmallows, make fondue, or even enhance your dining experience with a warm, cozy setting.
    • Eco-friendly Options: Most indoor fire pits run on propane or gel fuels, both of which are smokeless, odorless, and offer an environmentally friendly alternative to traditional wood-burning options.
    • Easy Installation & Maintenance: Indoor fire pits are generally simple to install and maintain, with no need for the extensive setup required for a full fireplace or chimney. There’s no ash or soot to clean up, making them a low-maintenance option for homeowners.

    Types of Indoor Fire Pits

    Indoor fire pits come in a wide range of designs and styles to suit different preferences, home aesthetics, and functional needs. Here are a few popular options:

    1. Indoor Fire Pit Coffee Tables
      These multi-functional tables combine the warmth of a fire pit with the practicality of a coffee table. A small hearth is built into the center of the table, allowing you to sit around it, enjoy a cup of coffee, and engage in conversation while basking in the glow of the fire. The materials used in these tables are designed to withstand heat, ensuring safety while offering an eco-friendly solution with smokeless fuel. They make a great addition to living rooms or patios that are enclosed.
    2. Indoor Tabletop Fire Pits
      For a more compact and affordable option, an indoor tabletop fire pit is an excellent choice. These small fire features are designed to sit on your tabletop, adding a cozy, romantic touch to any room. While they don’t provide significant warmth, they do serve as an elegant and tranquil decorative element. Ideal for dining areas or as a centerpiece on a coffee table, they create a pleasant atmosphere without the smoke or ash of traditional fires.
    3. Fire Pit Bowls
      Fire pit bowls are versatile and can be placed on a stand or integrated into furniture pieces. They often feature a larger flame compared to tabletop versions, making them perfect for creating an intimate and inviting environment. These designs can be fueled with propane or gel, depending on the size and type of fire pit you choose.

    Choosing the Right Indoor Fire Pit for Your Home

    Before purchasing an indoor fire pit, it’s essential to determine the primary function you want it to serve. Do you want it to be purely decorative, or do you need it to provide additional warmth? Here are some factors to consider when selecting your indoor fire pit:

    • Functionality: If you’re looking for warmth, opt for a larger model that can provide significant heat. If aesthetics and ambiance are your primary goals, a smaller tabletop fire pit might suffice.
    • Safety: Always choose a fire pit from a reputable manufacturer to ensure that it adheres to safety standards. Features like automatic shut-off valves, stable construction, and safe fuel sources are important to look for.
    • Fuel Type: Indoor fire pits often use either propane or gel fuel. Propane is more common for larger models, while gel fuel is often used for smaller tabletop versions. Both options are smokeless and provide a cleaner experience than traditional wood-burning fires.
    • Warranty & Support: Look for a product with a warranty, as this will ensure that the manufacturer stands behind their product. Also, check if customer support is available in case of any issues down the line.

    Final Thoughts

    An indoor fire pit can transform your living space into a warm, welcoming haven. Whether you want a functional piece to provide warmth during winter or a stylish center for cozy gatherings with friends and family, indoor fire pits offer a versatile and elegant solution. From fire pit coffee tables to tabletop models, there are plenty of options to suit different tastes and budgets. With simple installation, minimal maintenance, and no smoke or ash to worry about, it’s no wonder why more and more homeowners are adding these beautiful, functional pieces to their homes. Just be sure to choose a high-quality, safe product from a trusted manufacturer, and you’ll be ready to enjoy the benefits of a fire inside your home.

  • The Dakota Fire Pit: A Survivalist’s Secret to Efficient and Smokeless Heat

    The Dakota Fire Pit: A Survivalist’s Secret to Efficient and Smokeless Heat

    The Dakota Fire Pit is a unique and highly efficient outdoor fire-making technique that’s gaining popularity due to its practicality and fuel efficiency. Unlike conventional campfires, the Dakota Fire Pit uses a clever system of two interconnected holes that not only generate a more intense heat but also help eliminate smoke. This simple yet effective design makes it an ideal choice for campers, survivalists, or anyone looking to create a sustainable and smoke-free fire.

    How the Dakota Fire Pit Works

    The Dakota Fire Pit consists of two holes that are dug into the ground, with one acting as the main fire pit and the other serving as an air intake. These holes are positioned around 7 inches apart to allow the second hole to draw in oxygen and push the smoke out of the fire. This design increases the combustion rate, making the fire burn hotter and more efficiently than a traditional fire pit. As a result, you can cook more effectively with less wood, saving both fuel and time.

    This method works by creating a draft system that supplies oxygen to the fire, intensifying the heat. The deeper the holes, the more effective the system becomes. The lack of smoke also reduces the risk of attracting unwanted attention, making it ideal for discreet outdoor activities, such as camping, hunting, or survival situations.

    Key Benefits of the Dakota Fire Pit

    1. Smokeless Design
      One of the standout features of the Dakota Fire Pit is its smokeless nature. Traditional campfires can produce a lot of smoke, which can be unpleasant and may even be dangerous in certain survival scenarios. With the Dakota Fire Pit, the second hole helps draw smoke away from the fire, creating a cleaner, more breathable environment. This is especially useful if you’re trying to avoid detection in the wild.
    2. Efficient Fuel Usage
      Because the Dakota Fire Pit burns hotter than a standard campfire, it uses significantly less wood. The improved combustion process means that you can cook or stay warm with much less fuel, which is crucial when resources are limited.
    3. Compact and Easy to Build
      The Dakota Fire Pit is incredibly simple to construct. You don’t need any specialized materials or tools—just a basic digging tool like a stick or shovel and some ingenuity. You’ll need to dig two holes: one for the fire and one for the air intake. This makes it an excellent option for survivalists or anyone looking for a quick and effective way to create a fire without relying on complex equipment.
    4. Ideal for Cooking
      Due to its intense heat, the Dakota Fire Pit is perfect for cooking in outdoor or field conditions. It provides a concentrated and stable source of heat, making it ideal for preparing meals while camping or surviving in the wilderness. Whether you’re boiling water, roasting meat, or cooking over the fire, the Dakota Fire Pit ensures that the process is efficient and effective.
    5. Survival Situations
      The Dakota Fire Pit is a must-know technique for survival enthusiasts. In a pinch, this method can help provide warmth, heat food, and even purify water in the wild. It is especially beneficial in colder environments where staying warm is a priority. Additionally, the construction of the Dakota Fire Pit requires very little in terms of materials, making it an invaluable skill when living off the land.
    What is a Dakota Fire Pit

    How to Build a Dakota Fire Pit

    Building a Dakota Fire Pit is easy and can be done with minimal tools and materials. Here’s a basic guide on how to construct it:

    1. Find a Suitable Location
      Look for a flat, safe spot to build your Dakota Fire Pit. Avoid areas with dry vegetation or anything flammable nearby.
    2. Dig the Main Fire Pit
      Dig a small hole, roughly 12 to 18 inches deep, for your fire. This is where the flames will burn.
    3. Dig the Intake Hole
      About 7 inches away from the main fire pit, dig a second hole that is about 6 to 8 inches deep. This hole will serve as the air intake, drawing oxygen to fuel the fire.
    4. Connect the Two Holes
      Use a stick or shovel to create a small trench between the two holes. The intake hole should be positioned to direct oxygen into the fire, which will make it burn hotter and more efficiently.
    5. Start the Fire
      Begin by lighting the fire in the main pit, and the intake hole will provide the necessary airflow to keep the fire burning strong. Adjust the depth of the intake hole if needed to control the flow of oxygen.
    6. Cooking and Heat
      Once the fire is established, you can cook your meals or use the heat to stay warm. The temperature of the fire will be significantly higher than that of a traditional campfire, so it will cook food faster and with less wood.

    A Must-Know Technique for Survivalists

    While the Dakota Fire Pit may not be suitable for regular home use, it’s a game-changer for those spending time in the wilderness. Whether you’re out in the wild or in a survival situation, this clever design offers a highly efficient and discreet way to make fire. You don’t need special equipment or advanced skills—just a bit of effort and a willingness to adapt to nature’s needs.

    For those interested in learning more, there are numerous video guides and tutorials available online that explain how to set up and use the Dakota Fire Pit, including adaptations for specific situations like shelter building.

    In conclusion, the Dakota Fire Pit is a practical, cost-effective, and smokeless way to build fire. Whether you’re out camping, cooking, or preparing for an emergency, this innovative fire-making technique could be a lifesaver. It’s simple, effective, and provides all the warmth and cooking ability you need without the hassle of a traditional fire.Attach

    Search

    Reason

  • Paver Fire Pit: The Perfect Backyard Addition for Style and Function

    Paver Fire Pit: The Perfect Backyard Addition for Style and Function

    If your backyard is paved, a paver fire pit is an excellent addition that can enhance both the aesthetic and functionality of your outdoor space. However, when integrating any new feature into your home’s design, it’s important to ensure that the structure complements the existing style rather than clashing with it. Creating harmony in your backyard design will not only elevate the look of the space but also ensure that your fire pit fits seamlessly into the environment, blending with other features without drawing unnecessary attention.

    A well-planned fire pit should enhance your outdoor experience without disrupting the flow of your yard. Whether you’re hosting a social gathering or enjoying a quiet evening, the fire pit should be a natural extension of your space, offering both warmth and a focal point for relaxation.

    DIY Paver Fire Pit: Simple, Creative, and Customizable

    Many people enjoy the process of crafting their own outdoor features, and a DIY paver fire pit is a perfect project for those who love working with their hands. The best part? It’s a straightforward and cost-effective way to add a personal touch to your backyard. There are numerous ideas available online, and many of them are simple to implement with minimal time and effort. The key is to choose a style and design that will work well with your existing outdoor aesthetic.

    Once you’ve decided on the perfect design for your fire pit, the next step is to select the materials that will bring it to life. You can choose from various types of pavers or stones that suit your style, from rustic to modern, ensuring that your fire pit is both functional and visually appealing.

    Steps to Build a DIY Paver Fire Pit

    Building a paver fire pit is relatively easy and doesn’t require advanced skills or tools. Here’s how to do it step-by-step:

    1. Examine the Area
      Before you start, carefully examine the area where you plan to place your fire pit. Ensure that there are no underground pipes, cables, or other hazards in the spot you’ve chosen. It’s crucial to pick a flat and safe location to avoid any future complications.
    2. Choose a Shape
      The next step is deciding on the shape of your fire pit. The two most popular options are round and square. Both have their advantages, but the shape should complement the layout of your yard. A round fire pit often feels more natural and organic, while a square one can provide a more structured and contemporary look.
    3. Dig the Pit
      Once you’ve marked your desired location, start digging the area for your fire pit. You’ll need to create a shallow depression, typically around 6 to 12 inches deep, depending on the size of your fire pit. The depth will provide a solid base for the pavers and prevent the fire from getting too high or unstable.
    4. Create the Mound
      After digging the pit, you may want to create a small mound at the center to provide additional structure for your fire. This mound will help the fire stay focused and burn more efficiently.
    5. Lay the Base Layer
      Begin by laying the first layer of pavers around the perimeter of the fire pit. Arrange the pavers tightly, ensuring they fit snugly together to create a solid base. This layer will provide support for the subsequent layers and help the fire pit stay intact as it heats up.
    6. Choose the Exterior Material
      For the outer layer of the fire pit, select durable materials like paver stones or other decorative stones that fit your design style. These materials should look natural and blend in with your backyard without detracting from the overall landscape. Make sure that the height of the fire pit is not too tall, as this could obscure the view of the flames. You want to be able to enjoy the fire and, if desired, use the pit for cooking or grilling.
    7. Consider Accessories and Seating
      Once the fire pit is constructed, think about the accessories you’ll use around it. Comfortable seating, such as outdoor chairs or benches, can make the area more inviting. It’s also important to have grilling tools and supplies for cooking if you plan to use the fire pit for barbecuing. Stock up on marshmallows, meats, or veggies, so you’re ready for a relaxing evening of grilling and enjoying the fire.

    Additional Tips for Your Paver Fire Pit

    • Safety First: Always ensure your fire pit is built in a location far from any structures, trees, or flammable materials. It’s best to place the fire pit on a flat, non-combustible surface, like gravel or stone, to prevent accidental fires.
    • Wind Considerations: Make sure the fire pit is placed in a sheltered area to avoid the wind blowing out the fire. You can add a windbreak around the pit or use a fire pit screen to control sparks.
    • Maintenance: Over time, your fire pit may accumulate ash or debris. Regular cleaning will keep it in good condition and ensure it burns efficiently.

    Conclusion: A Beautiful, Functional Addition to Your Backyard

    A paver fire pit is a fantastic way to add warmth and charm to your backyard. Whether you’re looking to host outdoor parties, cook meals over an open flame, or simply enjoy a relaxing evening by the fire, a well-designed fire pit will become the centerpiece of your outdoor space. By following the right steps and selecting the materials and design that fit your style, you can create a functional and aesthetically pleasing fire pit that blends seamlessly with your backyard’s layout. Happy building!

  • The Swedish Fire Log: A Multifunctional Outdoor Tool for Cooking and Illumination

    The Swedish Fire Log: A Multifunctional Outdoor Tool for Cooking and Illumination

    The Swedish fire log, also known by names like “primus wooden”, “Swedish fire”, or “Finnish candles”, is a versatile and ancient outdoor tool that serves multiple purposes. Whether you need to cook food, light your way, or simply keep warm during chilly outdoor adventures, the Swedish fire log is an ideal solution. It offers a practical and efficient way to utilize wood for heat and light, all while being easy to build and maintain.

    Choosing the Right Wood for Your Swedish Fire Log

    While there are no strict rules about the type of wood used for a Swedish fire log, it’s important to consider the characteristics of different timber types. For example:

    • Spruce and Pine: These woods tend to “pop off” and spark a lot, which can be entertaining but also makes them less suited for calm, sustained heat.
    • Birch: A good option for a fire log as it lights easily and provides steady warmth. However, it tends to crackle toward the end of its burn, which might be distracting.
    • Aspen: The most ideal choice, as it burns smoothly, producing a steady and moderate flame without excessive cracking or popping. Aspen also creates an efficient heat source.

    Regardless of the wood you choose, it’s essential that it be dry but not decayed, as this ensures a clean and consistent burn. Fresh wood that is too damp can be difficult to ignite and may emit unpleasant smoke.

    How to Make Your Own Swedish Fire Log

    Creating a Swedish fire log is an easy and satisfying DIY project. Follow these simple steps to craft your own:

    1. Select Your Wood
      Choose a large, dry piece of timber, ideally around 25-50 cm (10-20 inches) in length. The diameter should be substantial enough to allow for several vertical cuts and provide a long burn time.
    2. Cut the Log
      Cut the log into quarters along its length, making three deep, evenly spaced cuts. These cuts should run from top to bottom but not all the way through the log—leaving about 2-3 cm (1 inch) at the bottom to keep the log intact. The number of cuts you make will depend on the size of your log, but the goal is to create several “segments” that will burn independently while staying connected.
    3. Secure the Pieces
      Bind the quarters together using wire, string, or even durable rope. The goal is to hold the sections tightly together, allowing for a stable structure that ensures good airflow. Proper airflow is essential for the fire to burn evenly, so avoid binding the quarters too tightly.
    4. Fill the Center
      Place small pieces of birch bark, dry twigs, or other fire-starting materials into the center of the log. These will act as kindling to get the fire going. Be sure to leave enough space for air to circulate, as restricting airflow will impede the fire’s performance.
    5. Fire Up Your Log
      To start the fire, soak the center of the log with a flammable liquid, such as lighter fluid, chainsaw oil mixed with petrol, or any other fire-starting fluid. Let it soak for a few minutes to ensure good ignition. Afterward, light the fire log using a match or lighter. Be prepared for the log to burn slowly and steadily, providing both light and heat.
    Swedish Fire Log Stove

    Using Your Swedish Fire Log: Cooking and Enjoying the Outdoors

    The Swedish fire log can be used for various outdoor activities, from cooking to simply enjoying a peaceful evening under the stars. Here’s how you can use it effectively:

    • Cooking: The Swedish fire log makes an excellent, compact cooking station. As the fire burns, it radiates heat, which is perfect for boiling water or cooking food over the flame. You can place a pot, kettle, or even a grill grate above the fire to prepare meals while enjoying the warmth of the log.
    • Illumination: If you’re in need of a portable light source, a Swedish fire log can also act as a torch, illuminating the surrounding area. The fire creates a gentle, flickering light that can help guide you on hikes or brighten up a campsite.
    • Heat: The slow, steady burn of the log makes it a reliable heat source for chilly nights in the wilderness or your own backyard. It’s a great alternative to a traditional campfire and can keep you warm for hours.

    Safety Tips for Using a Swedish Fire Log

    While the Swedish fire log is a simple and effective tool, it’s important to follow some safety guidelines:

    • Placement: Always use your fire log on a non-flammable surface, such as gravel or dirt. Avoid placing it directly on grass or wooden decking.
    • Supervision: Never leave the fire unattended. It’s important to monitor the log as it burns to prevent any accidental fires.
    • Wind and Weather: Be mindful of windy conditions, as the log can become a fire hazard if not properly controlled. Ensure the surrounding area is clear of flammable materials.

    Conclusion: A Practical and Fun Outdoor Essential

    The Swedish fire log is a multi-functional, eco-friendly tool that can add both warmth and functionality to your outdoor adventures. Whether you’re cooking a delicious meal, lighting your way on a hike, or simply enjoying a crackling fire, the Swedish fire log is a must-have for anyone who enjoys spending time outdoors. Easy to make and highly effective, this traditional yet simple tool is sure to enhance your camping experience or backyard gatherings. So, gather some dry wood, get crafting, and enjoy the warmth and light of your own Swedish fire log!

  • Why Fire Pit Grills Are the Perfect Outdoor Addition: A Must-Have for Backyard Entertainment

    Why Fire Pit Grills Are the Perfect Outdoor Addition: A Must-Have for Backyard Entertainment

    In recent years, fire pit grills have skyrocketed in popularity, and for good reason. These multifunctional devices offer more than just warmth—they combine the joy of a roaring fire with the ability to cook delicious meals, making them the perfect centerpiece for outdoor gatherings. Whether you’re grilling up a feast, enjoying the cozy ambiance of a crackling fire, or simply spending quality time with friends and family, a fire pit grill enhances your backyard experience. Plus, cooking over an open flame is a healthier, low-calorie way to prepare food, as it doesn’t require oils or fats, allowing you to enjoy a more wholesome meal.

    Choosing the Right Fire Pit Grill for Your Backyard

    When selecting a fire pit grill, the style, size, and features you choose will depend on your intended use and budget. There are plenty of options on the market, ranging from simple models to more sophisticated, multi-functional systems. Many people opt for fire pit grills that are not only functional but also visually appealing, making them an attractive addition to their outdoor décor.

    One of the most important factors to consider is the fuel type. Most fire pit grills are either charcoal or wood-burning, as the smoke from natural wood imparts an unbeatable smoky flavor to your meats. If you’re a fan of traditional barbecue flavors, this is the way to go. Some models also offer the option of using gas for a more convenient and cleaner cooking experience.

    For those who value portability, look for a fire pit grill made of light steel and equipped with wheels. This makes it easy to move the grill to different areas of your backyard, patio, or even on camping trips. Whether you’re hosting a backyard party or enjoying a quiet evening with family, a fire pit grill can be easily adjusted to fit your needs.

    The Fire Pit BBQ Grill Combo: Versatility and Functionality

    One standout option in the world of fire pit grills is the fire pit BBQ grill combo. This versatile piece of outdoor furniture serves multiple functions in one design: it can act as a dining table, a campfire, and a grill all in one. Often designed in an octagonal shape, these combos provide a sleek and modern look, making them an ideal choice for those who want both style and functionality.

    What makes the fire pit grill combo especially convenient is its removable wooden part, allowing you to store it away for the winter. The design often includes a side access door, making it easy to clean out the ashes after a grilling session. With its ability to seamlessly combine dining, fire, and grilling in one unit, this type of fire pit is perfect for entertaining guests or simply enjoying a cozy meal outside.

    Other Types of Fire Pit Grills: Find the Perfect Fit

    Beyond the fire pit grill combo, there are numerous other variations to suit different needs and preferences. Here are a few other options you might consider:

    • Outdoor Fireplaces and Chimneys: These add a rustic or elegant charm to your outdoor space, while offering warmth and a comforting glow. Some models also include grill options, combining the best of both worlds.
    • Gas or Wood-Burning Grills: Whether you prefer the convenience of gas or the authentic smoky flavor of wood, you’ll find grills designed to suit your cooking style. Gas grills provide a more hands-off cooking experience, while wood-burning grills offer traditional, flavor-packed meals.
    • Portable or Permanent Grills: For those who love to take their grilling on the go, portable fire pit grills are an excellent choice. These compact, mobile units can be moved easily and are ideal for camping trips, picnics, or tailgates. On the other hand, permanent models offer more stability and space for larger gatherings and backyard setups.
    Brick BBQ Grills Designs

    Which Fire Pit Grill is Right for You?

    The beauty of fire pit grills lies in their ability to combine relaxation, cooking, and outdoor ambiance all in one unit. Whether you want a simple metal bowl with a grate, a sophisticated BBQ grill combo, or a permanent outdoor fireplace, there’s a fire pit grill out there that perfectly fits your needs. As you decide which one to choose, consider factors like fuel type, portability, size, and multifunctionality. Each style offers its own benefits, so the choice comes down to what works best for your outdoor space, your cooking preferences, and your budget.

    No matter which option you go for, a fire pit grill is bound to become the ultimate entertainment feature for your backyard—turning every meal into an experience and making every outdoor gathering even more special.

  • Create a Cozy and Stunning Sunken Fire Pit for Your Garden

    Create a Cozy and Stunning Sunken Fire Pit for Your Garden

    A sunken fire pit is a unique and beautiful addition that can completely transform your garden, creating a perfect spot to unwind. Picture yourself on a peaceful summer evening, lounging in a comfortable chair, listening to the crackling of firewood while the smell of a nearby barbecue fills the air. A sunken fire pit brings both warmth and charm to your outdoor space, making it an ideal place to gather with friends or relax after a long day.

    The best part? You don’t need to spend a fortune to build a sunken fire pit. With a little creativity and some leftover materials, you can construct a fire pit that complements the style of your home and backyard. Whether you use bricks, stones, or even metal elements, you can customize the design to fit your outdoor aesthetic.

    How to Build Your Own Sunken Fire Pit: A Simple DIY Guide

    Building a sunken fire pit in your backyard can be a rewarding DIY project. Here’s a step-by-step guide on how to make your own.

    1. Digging the Hole: The Foundation of Your Hearth
      Start by digging a hole for the fire pit. Aim for a depth of at least 30 cm (about 12 inches). The bottom of the hole should slope slightly inward, forming a funnel-like shape that directs the fire and heat toward the center. This will help create a more contained and efficient flame. The walls of the hole should also be angled to ensure stability when you start laying the bricks.
    2. Laying the Bricks
      Once your hole is ready, begin laying bricks vertically along the walls. Position each brick so the edge faces inward toward the fire. This creates a secure, durable structure for your fire pit. As you lay the bricks, make sure to fill in any gaps between them with clay or mortar to ensure the structure holds up over time.
    3. Filling the Base with Gravel
      After the brickwork is complete, fill the bottom of the fire pit with medium or coarse gravel. The gravel layer should be about 10 cm (4 inches) deep. This helps with drainage and ensures that the fire pit remains stable and secure. It also improves airflow, which will help the fire burn efficiently.
    4. Selecting a Safe Location
      Choose a location for your sunken fire pit that is away from trees, buildings, or other flammable structures. Ideally, the fire pit should be placed in an open area of your yard, with plenty of space around it for safety. Once you’ve chosen the spot, mark the area with a circular outline, using something like a string or an iron rim to define the boundary of the fire pit.
    5. Preparing the Ground
      Remove the grass and soil within the marked circle to a depth of about 10–15 cm (4–6 inches). Once the area is cleared, level and compact the ground to create a stable base for the fire pit. For an extra touch, you can surround the rim of the fire pit with concrete blocks, bricks, or stones to create a clean, finished look.
    6. Building the Hearth
      If you’d like to create a more formal, structured design, you can add a wooden deck around the fire pit. First, prepare the “deck” by cutting the sheets of wood to the desired size. Once cut, use screws to fasten the pieces together, and then dig the “deck” into the ground or attach it to a flat steel sheet. This option works great if you prefer a more modern aesthetic for your sunken fire pit.
    7. Simple and Effective: The Minimalist Approach
      If you’re looking for a more straightforward approach, all you need are some leftover stones or bricks, a steel sheet, and gravel. Simply dig a hole with a depth of about 40 cm (16 inches) and a diameter of 1 meter (3.3 feet). Fill the bottom with gravel or sand for drainage, and you’ve created your own simple but beautiful fire pit.

    Styling Your Sunken Fire Pit

    A sunken fire pit naturally creates a cozy and intimate vibe, but you can elevate it even further with a few extra touches. Add some comfortable seating around the fire pit, such as built-in benches, lounge chairs, or even colorful cushions. You can also enhance the area with outdoor lighting, potted plants, or decorative stones to create a charming, inviting atmosphere.

    Safety Considerations for Your Sunken Fire Pit

    While a sunken fire pit adds warmth and beauty to your garden, it’s important to prioritize safety. Always keep a safe distance from flammable objects, and never leave the fire unattended. Be mindful of local fire regulations and weather conditions. Before lighting the fire, make sure the pit is properly maintained and that the surrounding area is clear of debris.

    Conclusion: A Fire Pit That Enhances Your Outdoor Living Space

    A sunken fire pit is not only an attractive and functional addition to your garden but also a place for relaxation, socializing, and enjoying the beauty of nature. By using leftover materials and following simple steps, you can build a fire pit that suits your style and enhances your outdoor experience. With a bit of effort and creativity, your backyard can become the ultimate retreat for cozy nights around the fire.

  • Discover the Variety of Fire Pits at Bunnings: Perfect for Every Outdoor Space

    Discover the Variety of Fire Pits at Bunnings: Perfect for Every Outdoor Space

    When it comes to outdoor heating, a fire pit is an absolute game-changer, adding warmth, ambiance, and a sense of relaxation to your garden or patio. If you’re in the market for a fire pit, look no further than Bunnings, one of the largest and most trusted household hardware suppliers in Australia and New Zealand. Known for their extensive range of products, Bunnings offers a wide variety of fire pits, featuring numerous shapes, styles, and sizes to suit any taste and outdoor space. Whether you’re looking for a classic design or something a bit more unique, you’ll find it at Bunnings.

    Fire Pits from Bunnings

    A Fire Pit for Every Style and Need

    At Bunnings, you’ll find fire pits in all kinds of shapes and designs, ensuring you can pick one that fits perfectly with your home’s aesthetic. For example, if you’re looking for something eye-catching with a bit of flair, a Mexican fire pit might be the perfect choice. These fire pits are not only beautiful with their distinctive, intricate patterns, but they also fit effortlessly into any backyard or outdoor living space. Their unique design provides a stunning focal point, ideal for creating an inviting and cozy atmosphere.

    If you’re more interested in the warmth and charm of a traditional fire pit, Bunnings also offers an array of other options. From sleek, modern metal designs to rustic stone options, there’s something for everyone. Whether your taste leans toward minimalist, contemporary, or rustic, Bunnings has a fire pit that will enhance your outdoor environment.

    Stone Fire Pit Bunnings

    Transform Your Backyard with a Fire Pit

    Not everyone has the space or desire to have an indoor fireplace, but that doesn’t mean you have to miss out on the cozy ambiance of a fire. If you’re looking to create a special, peaceful spot in your backyard, a backyard fire pit is the ideal solution. After a long day, there’s nothing more relaxing than unwinding outside by the fire, surrounded by family and friends. However, before you make a purchase, make sure you have enough space and the proper preparations in place for your new outdoor centerpiece. Ensure the area is safe, well-ventilated, and free from any flammable materials.

    Fire Pits for Grilling: Perfect for Backyard Cooking

    If you love outdoor cooking and want a fire pit that doubles as a grill, Bunnings offers a fantastic selection of brazier fire pits designed specifically for this purpose. These fire pits are typically deep and sturdy, making them perfect for grilling delicious meals over an open flame. The curved metal bowl design is not only visually appealing but also practical, providing the perfect setup for barbecuing in your garden. Whether you’re cooking a few skewers of veggies or roasting marshmallows with friends, a brazier fire pit is an excellent addition to any backyard chef’s arsenal.

    Considerations Before You Buy: Safety, Style, and Maintenance

    While adding a fire pit to your outdoor space is exciting, it’s essential to consider all factors before making a decision. Safety is the number one priority when choosing a fire pit. Make sure that the area is clear of any hazards like overhanging trees or nearby structures. Also, check with local regulations regarding fire pits to ensure compliance with fire safety laws.

    Another important factor is style. A fire pit should complement the overall design of your yard or patio, so think about the materials, colors, and finishes that will work best with your existing décor. Whether you want a sleek, modern fire pit or a more rustic design, there are plenty of options to match your personal taste.

    Lastly, maintenance is something to keep in mind. Depending on the material, your fire pit may require periodic cleaning and care to ensure it lasts for years to come. Whether you opt for a metal, stone, or ceramic design, each material has different maintenance needs, so be prepared to give your fire pit the attention it deserves.

    Backyard Fire Pit Bunnings

    Is a Fire Pit Right for You?

    The decision to add a fire pit to your outdoor space ultimately comes down to personal preference. While it offers an abundance of benefits, such as creating a cozy atmosphere and serving as an excellent focal point for your backyard, it also requires some effort in terms of upkeep and safety. Before lighting your first fire, make sure you’re ready to take on the responsibility and enjoy the immense pleasure that comes with having a fire pit.

    Whether you’re in the mood for quiet relaxation or a lively evening with friends, a fire pit from Bunnings is an investment that can enhance your outdoor experience and elevate your backyard into a welcoming retreat.

  • Transform Your Backyard with a Square Fire Pit: The Perfect Addition for Your Home

    Transform Your Backyard with a Square Fire Pit: The Perfect Addition for Your Home

    A square fire pit isn’t just a place to gather around – it’s the heart of your outdoor space, where friends and family come together to enjoy warmth, good conversation, and unforgettable moments. Picture yourself on a cool evening, the flames crackling, and the scent of burning wood filling the air. Whether you’re unwinding after a long day or hosting a vibrant outdoor party, a square fire pit creates the perfect ambiance for any occasion.

    Why a Square Fire Pit? A square fire pit is not only a functional piece for your backyard, but it also adds a modern, geometric touch that complements various landscaping styles. The sharp, clean lines of a square design make it a striking contrast against the natural elements of your garden, giving your yard a sophisticated yet cozy vibe.

    Imagine a stone fire pit at the center of your garden, surrounded by comfortable seating, perhaps with garden swings nearby. This setup turns your outdoor space into a serene escape or an inviting gathering area for family and friends. From intimate gatherings to lively parties, your fire pit becomes the centerpiece of all kinds of memories. Bonus points: add a bonfire grill for grilling marshmallows or even cooking a meal under the stars, or host an outdoor cocktail party where your fire pit becomes the ultimate entertainment feature.

    Step-by-Step Guide to Building Your Own Square Fire Pit

    Building your own square fire pit can be a fun DIY project, and it’s a great way to customize your outdoor space to fit your style. Here’s how to get started:

    1. Choose the Perfect Location
      The first thing to consider when planning your square fire pit is its location. Ideally, place it in a spot that’s flat and visible from all sides. You want to ensure it creates a harmonious look with the other features in your yard. For safety reasons, avoid placing the fire pit near wooden structures, trees, or anything that could catch fire easily. A clear, open space is best.
    2. Consider Size and Proportions
      It’s essential to keep the size of your yard in mind when choosing the dimensions of your fire pit. A large fire pit can overwhelm a small yard, while a tiny one might look out of place in a spacious garden. Opt for something that feels balanced and suits the scale of your outdoor area.
    3. Building the Fire Pit: Digging and Laying the Bricks
      Start by digging a hole in the ground. The hole should be wider than the fire pit’s planned size, as you’ll need room to lay your bricks. Once the hole is prepared, start placing bricks vertically around the perimeter, stacking them securely to form the walls of the fire pit. Consider using heat-resistant stone or bricks for safety and longevity. If you want a more rustic look, you can use natural stones for a rougher texture.
    4. Top Edge Design
      To finish the top of your square fire pit, you can add a ring of bricks or even paving stones around the outer edge. If you have leftover pieces of paving tiles from garden paths or walkways, they work perfectly here for a cohesive look. For added functionality and style, you could even consider installing a stone countertop around the fire pit, providing a surface for drinks, snacks, or simply a place to rest while enjoying the flames.
    5. Landscaping Around the Fire Pit
      Once your fire pit is complete, turn the surrounding area into a beautiful, inviting space. Consider planting ornamental grasses, flowers, or even small shrubs to soften the edges and blend the fire pit with the rest of your garden. A few strategically placed garden swings or comfy outdoor chairs can complete the transformation into a charming outdoor retreat.

    Safety First: Essential Precautions

    While building and using a square fire pit can be a delightful addition to your home, safety should always be your top priority. Ensure that the area is clear of flammable materials, and always supervise the fire when it’s burning. Keep a bucket of water or fire extinguisher nearby just in case, and never leave the fire unattended. Additionally, be mindful of local fire regulations to ensure you’re adhering to safety guidelines in your area.

    Conclusion: A Backyard Haven Awaits

    With a little effort and creativity, a square fire pit can become the perfect addition to your outdoor space. Whether you’re enjoying a quiet night under the stars or hosting an epic backyard party, the warmth and glow of a fire pit provide both comfort and charm. Transform your backyard into a true haven with a DIY square fire pit, and create memories that will last a lifetime.Attach